A shopper in Birmingham walks into a retail store, connects to the guest Wi-Fi network, and expects to be online before reaching the next aisle. Instead, a clunky captive portal asks for too much information, uses vague button text, and makes the access step feel more like an application than a welcome. The shopper closes the page. The store loses a useful connection moment and a potential email lead.
That failure happens because teams often treat email capture forms as a marketing component and captive portals as a network component. On guest Wi-Fi, they're the same customer experience. Visitors are already authenticated by context because they're physically present, they want internet access immediately, and they're completing the form on a phone while watching signal and redirect behaviour. The winning design balances field count, copy, incentive, and compliance, then connects those choices to the authentication method behind the page.
Why Guest Wi-Fi Changes the Email Capture Game
A website visitor can browse around, compare pages, and return later. A guest on Wi-Fi usually has a narrower window of patience. They've entered a shop, campus, hotel, office, or event space and want a working connection now. That makes the splash page less like a conventional newsletter signup and more like a short exchange: the visitor provides a useful detail, and the venue provides access.
The retailer in Birmingham doesn't necessarily need a postcode, phone number, date of birth, and marketing preference before the customer can check stock or message a friend. An email-only form may be enough for the first interaction. A university might need a different flow for visitors, students, and staff. A corporate BYOD network may need authenticated access through an IPSK or EasyPSK workflow, with marketing permission handled separately rather than hidden inside the network login.
Practical rule: A guest Wi-Fi form should ask for the minimum information that supports the next useful action.
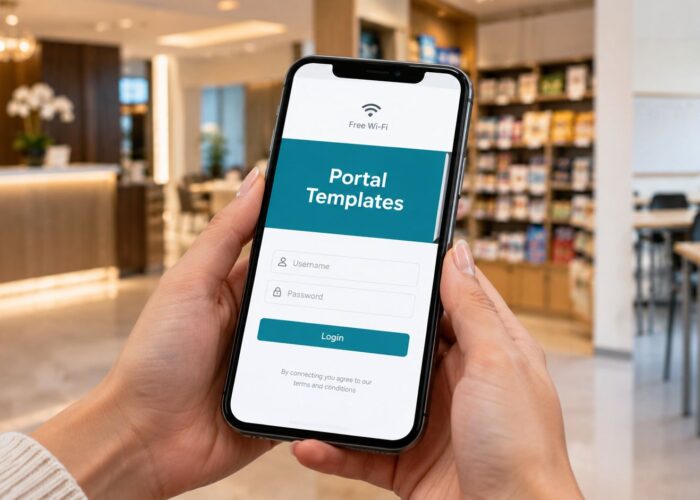
The splash page also carries a trust burden. A visitor is being redirected before internet access is granted, so unclear branding, broken redirects, or a suspicious-looking consent request can stop completion. The page needs to show the venue name, explain the benefit, make the access action obvious, and keep the form comfortable on a small screen. A clear guest Wi-Fi customer experience approach helps teams treat the portal as part of the welcome rather than an obstacle between the visitor and the network.

The authentication choice changes the conversion equation. Social login and social WiFi can reduce typing by using an identity provider. Captive portals can also support email collection, while passwordless delivery through IPSK or EasyPSK can make BYOD onboarding smoother but may provide less email visibility. On Cisco Meraki hardware, the SSID and splash configuration determine how users reach the access flow, while the marketing layer determines what happens after submission.
The practical question isn't “How do we collect more fields?” It's “What information can we reasonably request at this moment without breaking access?” That answer differs across retail, education, and corporate environments, even when the same Cisco Meraki access points provide the underlying connectivity.
What the Numbers Say About Email Capture Forms
Field count has a measurable cost. A campaign dataset cited by Benchmark Email reports 4.41% conversion for a single email field, 2.90% with a second field, and 1.93% with a third field in its discussion of email capture form benchmarks. Those figures aren't a promise for a captive portal, but they make the design principle clear: every added input creates another opportunity for hesitation or abandonment.
HubSpot reported that 74% of marketers used web forms for lead generation, and 49.7% identified web forms as their highest-converting lead-generation tool. Its historical analysis also found that the average web form used about 5 fields in 2019, while multi-step forms were reported to convert 86% higher than standard forms. These findings point to an evolution from “email only” toward structured flows, but a Wi-Fi splash page shouldn't automatically inherit the structure of a sales qualification form. See the related guest Wi-Fi analytics guidance when you need to connect portal activity with access outcomes.
| Form fields | Website conversion | Captive portal conversion | Notes |
|---|---|---|---|
| Email only | 4.41% | No universal benchmark | Lowest-friction starting point, with the website figure from Benchmark Email |
| Email plus one field | 2.90% | No universal benchmark | The second input adds friction |
| Email plus two fields | 1.93% | No universal benchmark | Use only when the extra data supports a clear use case |
Independent benchmark coverage reports an average opt-in conversion rate of about 3.2%, while another analysis cited popup email-signup conversion around 4.82%. Earlier data in that analysis reported 6.57% conversion on mobile popups compared with 3.77% on desktop, illustrating why placement and device context matter. These figures come from Stripo's opt-in benchmark discussion, and they should be treated as comparison points, not targets to copy blindly.
Captive portals amplify the downside of friction. Small screens leave less room for explanation, visitors may be distracted by the physical environment, and a session timeout or redirect loop can interrupt the process. Copying a five-field CRM form onto a splash page is usually a category error. Short forms favour lead volume, while longer forms can support qualification, so the right choice depends on whether the visitor is joining a retail list, requesting campus information, or entering a corporate visitor network.
Designing Fields, Copy and Incentives That Convert
A guest reaches a retail splash page, wants internet access, and has little patience for a form that feels like a sales qualification process. Treat the fields, message, and reward as one UX decision. If the benefit is unclear, even a short form feels intrusive. If the business will not use the requested information, remove that field.
Start with the smallest useful form
For a retail splash page, begin with email only. The customer wants access, while the business can use the address for a welcome message, store updates, or a permission-based offer. If a venue needs segmentation, add name and postcode only when the page explains the exchange. A venue might use those fields to distinguish local visitors from event attendees. A university may ask for an affiliation choice rather than collect personal details it does not need.
Use a simple field test: if nobody will act on the answer soon, remove it. Lead capture forms for virtual tours can justify richer qualification because the visitor is requesting a specific follow-up experience. A guest Wi-Fi page normally has a tighter moment of intent, so extra fields need a clear operational reason.
Make the copy finish the visitor's thought
Replace administrative language with a direct benefit. Practical rewrites include:
- “Enter your details to continue” becomes “Get online with free guest Wi-Fi.”
- “Submit” becomes “Get Online.”
- “Marketing consent required” becomes “Choose whether you'd like occasional offers and updates.”
The first line should explain access. The supporting line should state what happens to the email and distinguish required access steps from optional marketing permission. The button should describe the immediate result, not the internal action performed by the form.
Choose an incentive that belongs in the venue
Free Wi-Fi is often the primary exchange. A downloadable offer can work when visitors have time to engage, while a competition entry may suit retail campaigns or events. Generic or heavily promotional voucher codes can make the portal feel like spam, especially when the visitor only wants connectivity. For other practical options, see these non-monetary incentive ideas.

A coffee chain might display: “Join the guest Wi-Fi. Get online and receive occasional menu updates.” A university could say: “Connect to campus guest Wi-Fi. Receive public event and visitor information.” A corporate BYOD portal should be more restrained: “Connect to the visitor network. We'll use your email for access support and the permissions you select.” Each example matches the offer to the visitor's context instead of forcing one marketing message across every SSID. The same discipline matters when IPSK or EasyPSK handles access, because a credential flow can reduce the email opportunity unless the opt-in is deliberate and clearly separate.
Building the Flow on Cisco Meraki and Splash Access
Start in the Cisco Meraki dashboard at the SSID settings where the captive portal is configured. The network team should confirm which SSID serves guests, students, retail visitors, or corporate BYOD users before changing the splash behaviour. A hosted option such as Splash Access can provide a branded page with less custom engineering, while a custom HTML landing page gives developers tighter control over layout, validation, and data handling.
The key choice is the login method. Email signup, social login, and passwordless PSK delivery solve different problems.
- Email signup asks for at least an email address, submits the form, and releases access after the required validation or consent step.
- Social login uses a captive portal to show a branded splash page and begin an OAuth Authorization Code Flow with the selected identity provider. This can simplify onboarding when visitors prefer an existing identity.
- IPSK or EasyPSK delivery can push individual credentials for BYOD access, reducing the need for shared passwords. The trade-off is that a frictionless credential flow may produce less email data unless the portal deliberately includes an opt-in step.
Captive portal social login commonly requires a Meraki AP or controller walled garden that permits the authentication domains. The portal also needs valid HTTPS, and the complete redirect should be tested on both phone and laptop, as described in this social media authentication setup guidance. A social login flow can intercept the guest's first DNS request, display the branded page, and then hand authentication to the identity provider, so a small configuration error can prevent both access and capture.
Wire the data path before styling the page
Map the submission to the mail provider or CRM through a direct webhook or native integration. Confirm the list, consent field, source value, and campaign label before inviting real visitors. The guest Wi-Fi login page implementation should also handle the thank-you state carefully. A visitor who abandons the form must not receive credentials, while a successful submission should receive the credential push or access continuation without another confusing prompt.
Test the entire sequence, from device detection to SSID association, portal display, form submission, redirect, and internet access. Re-authentication loops deserve special attention because they can turn a short email capture into a repeated login cycle. For education and corporate BYOD, test the IPSK and EasyPSK path on managed and unmanaged devices, then verify that marketing permission remains separate from the access credential.
Compliance That Improves Conversion
A guest reaches the captive portal, needs Wi-Fi, and sees an email field. At that moment, privacy wording affects whether the exchange feels fair or risky. Place a short notice directly above the submit button so visitors understand the request before sharing an address. A footer link alone may preserve space, but it does little to build confidence on a network gateway.
GDPR-style guidance expects consent to be specific, informed, unambiguous, and given through clear affirmative action. Store proof of consent with the timestamp, source or method, and policy version, then provide a simple withdrawal route. The compliance guidance for email capture covers unbundled consent, progressive disclosure, region-specific logic, and consent metadata. For teams reviewing retention and deletion processes, understanding data subject rights helps connect the form experience with the obligations that follow.

Use two layers. The first states what data you collect and why, in plain English. The second contains full privacy details and separate choices for optional marketing. Keep Wi-Fi access separate from promotional permission, and leave marketing boxes unticked. A confirmed subscription path, such as the one described in these Shopify double opt in workflows, can produce a cleaner record when a campaign requires confirmed permission.
For Cisco Meraki captive portals, the audit record should sit beside the marketing profile, not only in network session logs. Store the consent text or policy version, submission time, source, and relevant device or session reference according to your retention policy. A MAC address can connect an access event to a consent event, but it may count as personal data and needs the same privacy controls.
Trust is part of the offer. Visitors are more willing to complete an email capture form when they understand the exchange and can change their mind later.
Across retail, education, and corporate BYOD deployments, clear wording supports a steadier experience than aggressive permission prompts. Compliance supports credible UX, while IPSK, EasyPSK, or social login choices determine how much access friction the form adds.
Testing, Measuring and Iterating Without Spinning Your Wheels
A guest enters a retail store, school campus, or corporate lobby, opens the captive portal, submits an email, and still cannot get online. That is a failed Wi-Fi experience, even if the form conversion rate looks healthy. Measure the lead action and the network result together.
Change one meaningful variable per test: field count, headline promise, button colour, incentive placement, or authentication path. Changing the headline and form length at the same time leaves the cause unclear. IPSK, EasyPSK, and social login also change the conversion math, so compare like-for-like flows rather than treating every portal view as the same opportunity.
Track three rates:
| Metric | Why it matters |
|---|---|
| Form view rate | Confirms that the captive portal appears to the intended devices and traffic segment |
| Email submission rate | Shows how effectively the page turns a portal view into a captured address |
| Successful network access rate | Verifies that the marketing action does not disrupt the actual Wi-Fi experience |
A submission spike means little if credential errors leave visitors offline. Use your own baseline by form type, placement, device, SSID, and traffic source. External benchmarks provide orientation, but the Cisco Meraki portal on your network is the more useful reference. The published opt-in benchmark coverage and email capture form measurement guidance can help frame questions, not replace local testing.
Keep an experiment log
Record the hypothesis, audience or SSID, variant, sample size, traffic conditions, authentication method, and outcome. Test during representative periods, including busy events and ordinary operating hours. A quiet afternoon can make a weak form appear effective.
When a variant underperforms, inspect the sequence. Did visitors leave after reading the consent notice? Did email validation reject legitimate addresses? Did the button fail on mobile? Did the form submit while IPSK or EasyPSK authentication failed? For social login, check whether the extra permission step reduced completion.
Review failed tests monthly. A documented result stops the next deployment from repeating the same change without learning from it. Over time, the log becomes a practical reference for retail stores, campus networks, and corporate visitor flows. Sporadic testing produces noise; consistent records show which form and access path work for each environment.
Your Pre-Launch Checklist for Better Conversions
Run this checklist on the actual device and SSID, not only in a desktop preview.
Form design
- Keep fields focused: Cap the form at two or three fields where qualification matters, with email as the essential core field.
- Design for thumbs: Use a mobile-first layout, large tap targets, readable text, and no horizontal scrolling.
- Show the exchange: State what the visitor gets immediately, whether that's guest Wi-Fi, access support, or a relevant venue offer.
Copy and incentive
- Lead with the benefit: Make the headline explain the Wi-Fi outcome instead of describing an internal submission process.
- Use a clear button: Choose “Get Online” rather than “Submit” when the immediate result is network access.
- Write human errors: Tell visitors how to fix an invalid email or missing field without technical language.
- Keep the incentive credible: Use a specific, useful offer and avoid voucher language that looks like spam.
Technical integration
- Check the SSID mapping: Confirm that the Splash Access policy is connected to the intended Cisco Meraki SSID.
- Verify the destination list: Submit a test lead and confirm that Mailchimp or the CRM receives the correct fields, source, and permission values.
- Test BYOD credentials: Run IPSK and EasyPSK flows on the devices visitors use, including unmanaged clients.
Compliance and measurement
- Leave marketing consent unticked: Make optional promotional permission a clear affirmative choice.
- Open the privacy link: Confirm that the notice works on mobile and matches the policy version stored with the submission.
- Document retention: Record how long consent and access data remain available and how withdrawal requests are handled.
- Capture the baseline: Save the current conversion and successful access rates before launching an A/B variant.
- Define success first: Decide whether the test optimizes email submissions, completed Wi-Fi access, or qualified list growth.

The final check should take place on a freshly joined phone. Load the portal, complete the sign-up using only a thumb, follow the redirect, confirm internet access, and export the captured lead to verify that it reaches the correct destination. Repeat the access path on a laptop where the environment requires it, then check that an abandoned form doesn't release credentials.
Splash Access provides Cisco Meraki guest Wi-Fi splash pages, email capture, social login, IPSK, EasyPSK, and marketing integrations for retail, education, and corporate BYOD environments. Visit Splash Access to review the captive portal and authentication options, then test the complete journey from form submission to successful network access before your next deployment.