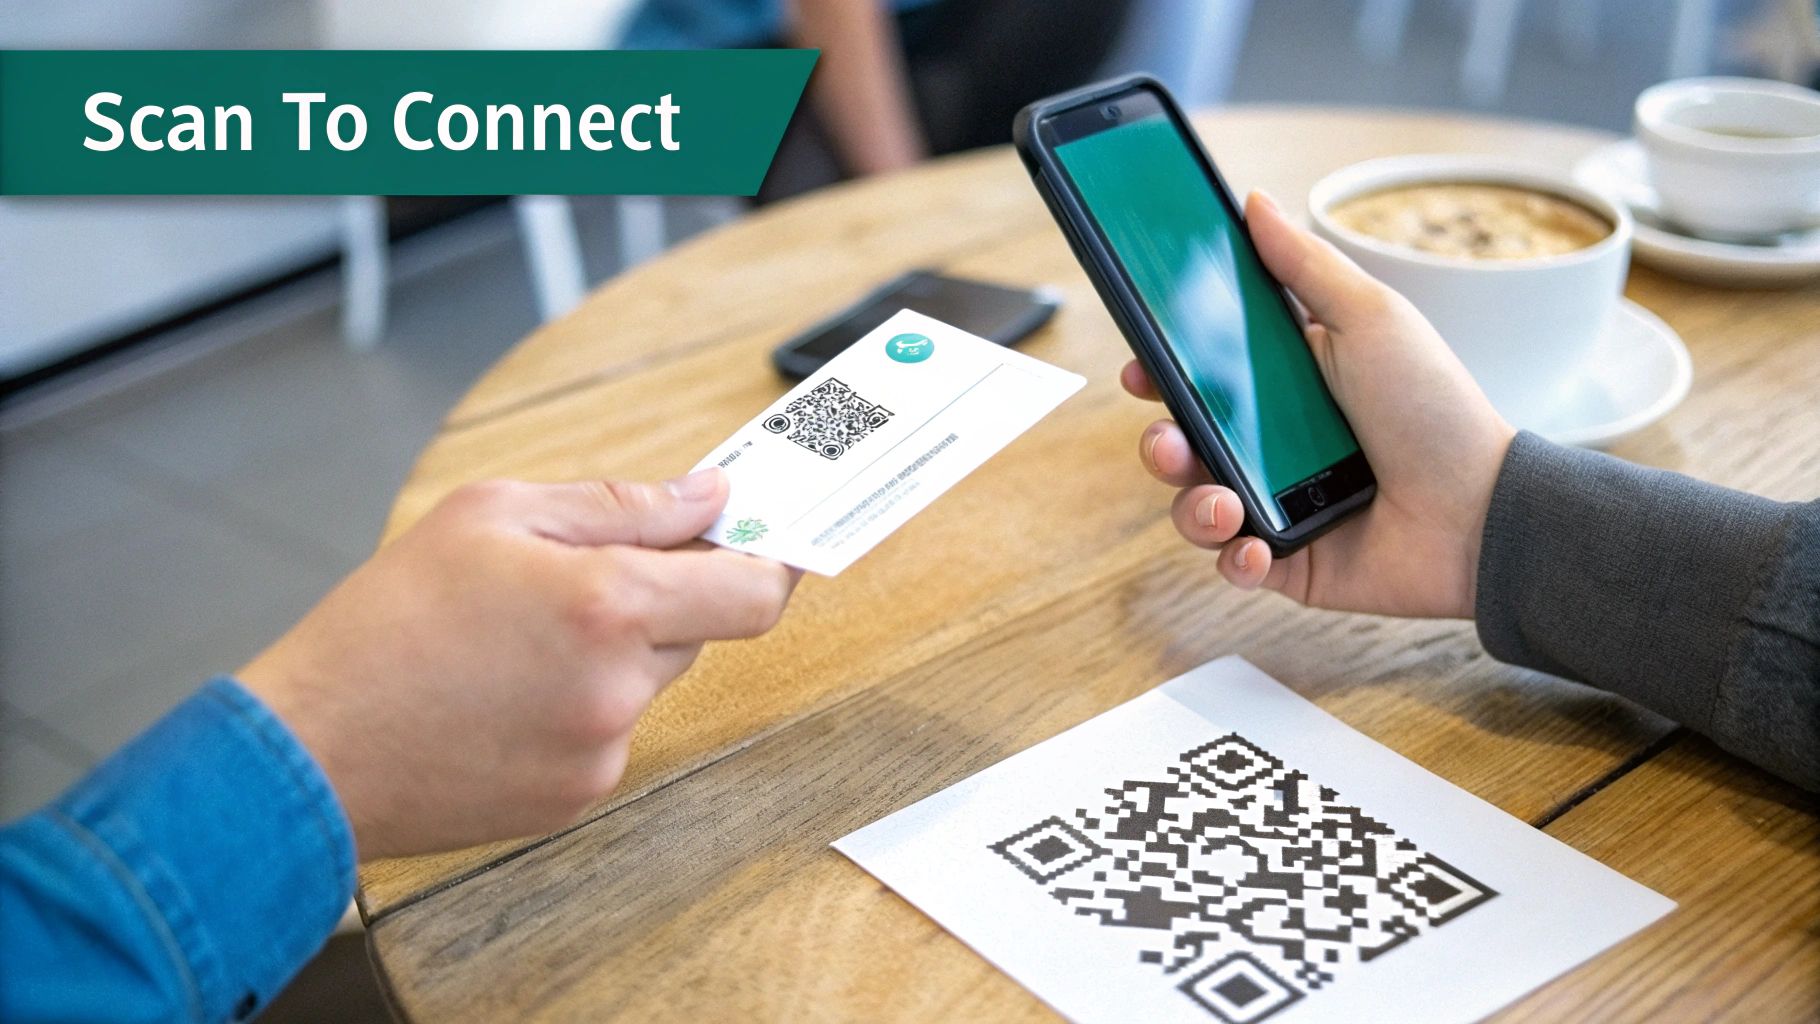
Hey there! Let's talk about a modern, elegant solution that does away with old-school paper sign-in sheets and confusing Wi-Fi passwords: a QR code check-in system. Instead of typing, guests simply point their smartphone camera and scan. This one action can connect them to your network or register their arrival, creating a smooth, professional first impression while gathering useful data for your business.
Why QR Code Check-In Is the Future of Guest Access
Let’s be honest: nobody misses fumbling with long Wi-Fi passwords or scribbling their name on a messy paper log at a reception desk. Those methods are not just inefficient; they're a privacy headache waiting to happen. Thankfully, there’s a much smarter way to manage how guests and visitors connect, and it leverages the technology already in everyone's pocket.

QR code check-in is quickly becoming the standard for busy places like hotels, stores, university campuses, and corporate offices. This isn't just a gimmick. It’s a genuinely powerful way to improve the guest experience and capture valuable information without any friction, especially in the Education, Retail, and corporate BYOD sectors.
The Power of a Simple Scan
At its most basic level, this technology turns the routine task of connecting to guest Wi-Fi into a seamless, positive interaction. You present a QR code, your guest scans it, and they're immediately directed to a branded Captive Portal to get online. No passwords, no fuss. That immediate, hassle-free connection is a massive win for guest satisfaction and a perfect fit for any BYOD (Bring Your Own Device) environment.
Of course, this experience is only as good as the network behind it. That's why pairing it with robust hardware from a provider like Cisco Meraki is a game-changer. Meraki’s gear provides the solid backbone needed to manage hundreds, or even thousands, of simultaneous guest connections, ensuring the process is always fast and reliable.
By combining a simple QR code with a powerful backend like Cisco Meraki, you transform your guest network from a simple utility into a strategic asset for security and marketing.
More Than Just Wi-Fi Authentication
The real value emerges when you look beyond just getting people online. The check-in process can be customized for different industries using sophisticated Authentication Solutions.
Here are a few real-world examples of how this plays out:
- Education: A university can use QR codes in dorms. Students scan to connect their devices to a secure network using IPSK (Identity Pre-Shared Key) or EasyPSK, which gives each student a unique key. This keeps the network locked down while making access dead simple for residents.
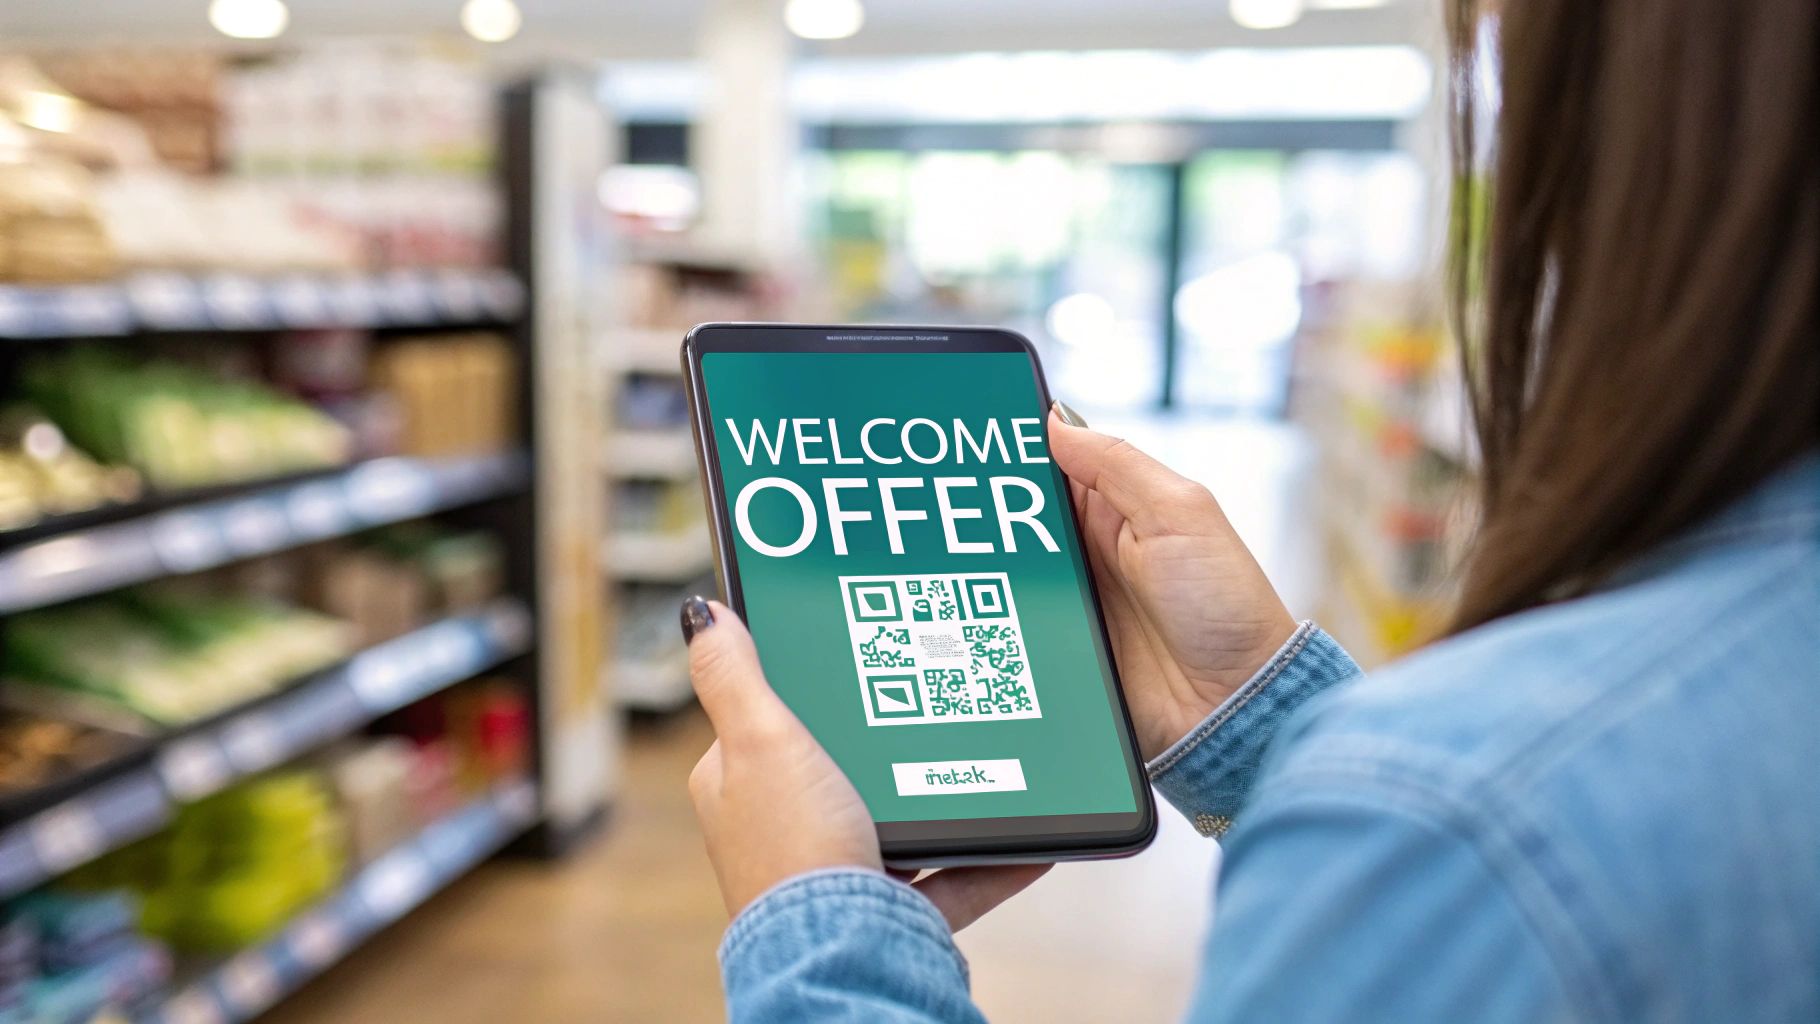
- Retail: A shopper scans a QR code to join the in-store Wi-Fi and is greeted with a landing page offering a 10% discount on their purchase. You can also offer social login or social wifi options, allowing them to connect with their social media profiles in exchange for valuable, anonymized demographic data.
- Corporate: A visitor arriving for a meeting scans a QR code at reception. This grants them temporary, secure access to the guest network, keeping them completely separate from your sensitive internal corporate network.
Ultimately, a well-designed QR code system delivers on three critical promises: speed, security, and simplicity. It removes friction for your guests and opens up new opportunities for your business, making it an essential tool for any modern venue.
Planning Your QR Code System for a Flawless Launch
Jumping into setting up a QR code check-in system without a clear strategy is a surefire way to run into problems down the road. Trust me, a bit of planning upfront will save you countless headaches and ensure the experience is smooth, secure, and genuinely useful for your visitors and your organization.
Let's start with the most important question: what are you trying to accomplish? Are you a retailer looking to offer simple guest wifi access in exchange for a marketing opt-in? Or maybe you're a university that needs to give students secure, no-fuss network access in their dorms. Your end goal will shape every decision you make, from the authentication method to the design of your captive portal.
The pandemic really put QR codes on the map, and their growth has been staggering. Between 2020 and 2023, global usage shot up by an incredible 433% as everyone scrambled for contactless solutions. With over 11 million US households scanning at least one code in 2023, it’s obvious this tech isn’t just a trend; it's a fundamental part of how people interact with physical spaces now.
Choosing the Right Authentication Method
Once you know your "why," the next big decision is the "how"—specifically, how users will get onto your network. This is where the combination of Splash Access and Cisco Meraki really comes into its own, giving you a whole menu of Authentication Solutions to choose from.
For a corporate BYOD environment or a university campus, security is everything. This is where methods like IPSK (Identity Pre-Shared Key) or its more manageable cousin, EasyPSK, are a perfect fit. Each user or device gets its own unique key, which keeps their traffic isolated and the network secure, all without making the connection process a nightmare for them.
On the other hand, if you're in Retail or hospitality, you probably care more about easy access and gathering useful data. In that case, you could set up your Captive Portal with social wifi login options. Guests can connect with their social media profiles, which makes it dead simple for them and gives you valuable (and consent-based) demographic info for your marketing efforts.
The best authentication method isn't a one-size-fits-all answer. It’s about finding the perfect match for your security requirements and the kind of user experience you want to create with your QR code check-in system.
Below is a quick comparison to help you match the right authentication method to your specific sector.
Choosing the Right Authentication for Your Sector
This table compares different authentication methods available through Cisco Meraki and Splash Access, helping you choose the best fit for your specific industry needs, from simple guest access to high-security corporate environments.
| Authentication Method | Best For | Key Benefit | Example Use Case |
|---|---|---|---|
| WPA2 with IPSK/EasyPSK | Corporate BYOD, Education, Healthcare | High Security: Each user/device gets a unique key, segmenting traffic and preventing unauthorized access. | A university issuing a unique Wi-Fi key to each student for secure dorm room access. |
| SAML/Azure AD Integration | Enterprise & Corporate | Seamless Integration: Leverages existing corporate credentials for secure, single sign-on (SSO) network access. | A company allowing employees to connect to the corporate Wi-Fi using their existing Azure AD login. |
| Email/SMS Verification | Retail, Hospitality, Public Venues | Lead Generation: Simple for guests, while capturing verified contact information for marketing. | A coffee shop offering free Wi-Fi after a customer enters their email address. |
| Social Media Login | Malls, Restaurants, Event Spaces | Rich Demographic Data: Easiest login for users, providing valuable, consent-based marketing insights. | A shopping mall allowing visitors to log in with their Facebook account to access Wi-Fi and receive targeted offers. |
| Click-Through Access | Quick-Service Venues, Lobbies | Frictionless Access: The fastest way to get users online with a simple agreement to terms. | An airport lounge providing immediate Wi-Fi access after a user clicks an "Accept & Connect" button. |
This table should give you a solid starting point for deciding which path makes the most sense for your deployment.
Strategic Placement for Maximum Impact
Finally, let's talk about the real world. Where are people actually going to scan these codes? The physical placement is just as critical as the technology. A QR code that’s hard to find or in a spot with bad Wi-Fi is just a frustrating dead end.
Put yourself in your user's shoes and think about their journey:
- Retail: Place codes on signs at the entrance, on table tents in your café, or even on shelf talkers in specific aisles to push targeted deals.
- Education: Display them prominently in student lounges, at library entrances, and inside welcome packets for new dorm residents.
- Corporate: A sleek, professionally designed QR code display at the reception desk makes it easy for visitors to get connected right as they sign in.
Before you start printing and sticking codes everywhere, doing a proper analysis is a smart move. Our guide on how to https://www.splashaccess.com/site-survey-for-wireless-network/ can walk you through checking for strong signal coverage in all your planned spots.
As you map out your system, you'll also want to consider whether to build a solution from scratch or use a ready-made product. Getting familiar with the differences between custom software vs. off-the-shelf solutions will help you make a choice that fits your budget, timeline, and in-house technical skills.
Configuring Your Meraki Captive Portal for QR Codes
Alright, you’ve done the strategic planning. Now it’s time to roll up your sleeves and get into the technical side of things: setting up your QR code check-in system within the Cisco Meraki dashboard. This is where we build the engine of your guest experience—the Captive Portal. If you're not a networking guru, don't sweat it. I’ll walk you through it.
The whole point here is to create a dedicated guest Wi-Fi network (what we call an SSID). When someone connects, they’re automatically directed to a branded splash page. This isn't just a login screen; it’s the central hub for your QR code process. By connecting it to Splash Access, we turn a basic network feature into a genuinely powerful tool for engagement and data collection.
First, Set Up Your Guest Wi-Fi Network
Before anything else, we need to create a separate network exclusively for your guests. I can't stress this enough—it's a fundamental security measure for any venue, from a school campus in the Education sector to a bustling Retail store or an office with a BYOD policy. You absolutely must keep guest traffic isolated from your primary internal network.
Jump into your Meraki dashboard and create a new SSID for guest access. The key step here is to enable the "Splash page" feature. Think of this page as the digital welcome mat. It's the very first thing your visitors will see right after they scan the QR code and tap to join your network.
This is where the planning you did earlier pays off. Your goals and chosen authentication method directly shape how this portal gets built.
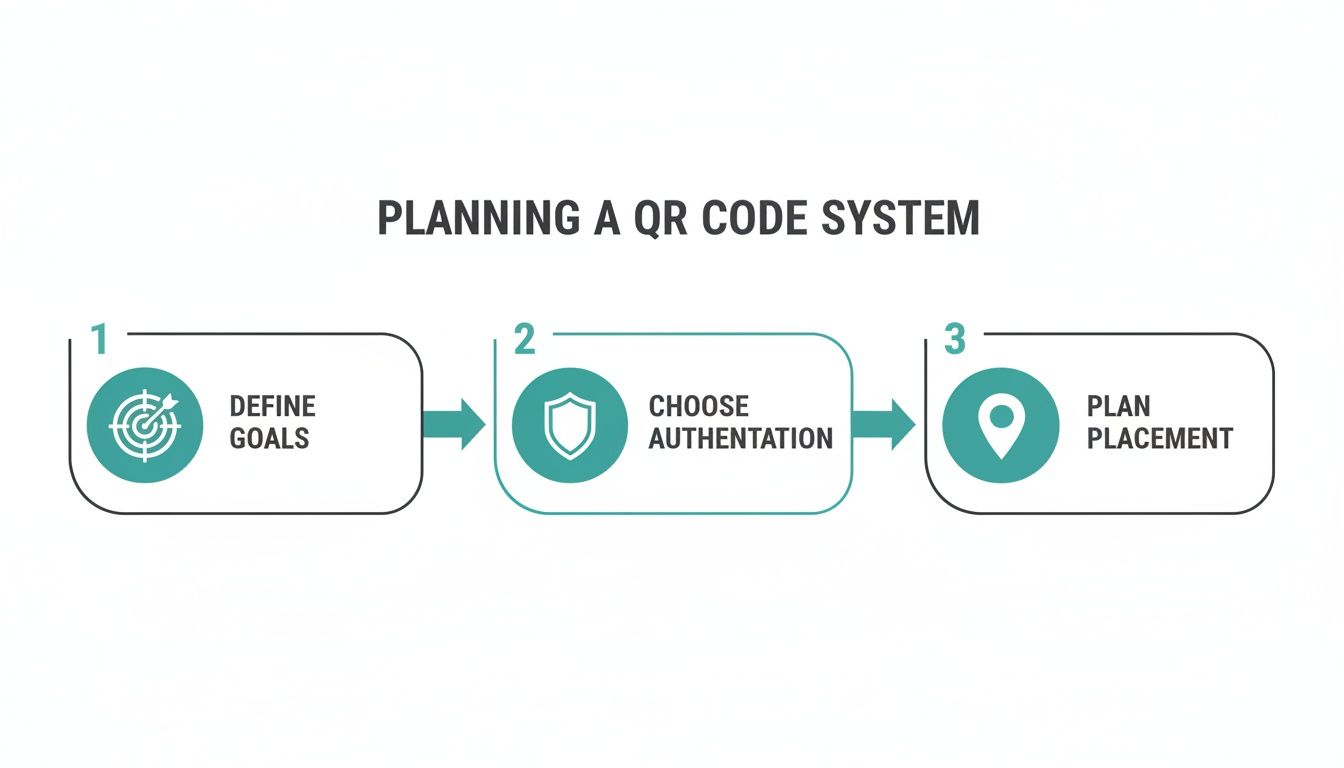
As the infographic shows, getting clear on your objectives and how users will log in are the bedrock of a successful captive portal configuration.
Customizing the User Experience
Let’s be honest, a generic, out-of-the-box login page looks unprofessional and lazy. This is a prime opportunity to reinforce your brand. Splash Access makes it simple to customize the captive portal with your logo, brand colors, and background imagery. A polished, on-brand portal immediately builds trust and makes the entire check-in process feel seamless and intentional.
Beyond just the look, you need to map out the user's journey. While Meraki has a few splash page options, the real power for a QR code system comes from redirecting to an external captive portal—which will be your unique Splash Access URL. This handoff is what unlocks the more advanced Authentication Solutions and data integrations.
The secret to a successful captive portal is finding the sweet spot between a frictionless user experience and your own business needs. The goal is to make it incredibly easy for people to get online while you gather the insights you need.
If you want to get into the weeds of how this works, you can learn more about how to tie QR codes directly to secure network keys by looking into QR IPSK visitor management solutions for Cisco Meraki. It’s a powerful way to handle authentication.
Fine-Tuning Your Access Control Settings
With your portal designed, the final step is to set the ground rules. Two settings are particularly important: access control and splash frequency.
- Access Control: This is where you decide what users can do once connected. A great practice is to set bandwidth limits for each person. This stops one user from hogging all the bandwidth while streaming videos, which is a lifesaver in busy places like university libraries or crowded cafes.
- Splash Frequency: How often do you want returning visitors to see this login page? Making them log in every single time is a surefire way to annoy them. I usually recommend setting this to once every 24 hours or even once a week for regulars. It creates a much smoother experience.
By taking the time to configure these options thoughtfully, you build a QR code check-in system that’s not just functional, but genuinely user-friendly for both your guests and your team.
Creating and Deploying Your Custom QR Codes
Alright, your backend is configured, and the captive portal is ready. Now for the fun part: creating the QR code itself. This little black-and-white square is the key that unlocks the entire seamless guest Wi-Fi experience you've just built. The good news is you don't need a degree in graphic design to make an effective, scannable code that connects people straight to your Cisco Meraki network.
The real power here comes from using a platform like Splash Access to generate dynamic QR codes. Unlike a static code that points to one URL forever, a dynamic one can be updated on the fly. This means if you need to change your landing page down the road, you can do it without having to reprint and replace every single sign or flyer. Trust me, that's a massive time and money saver.
Designing a User-Friendly QR Code
Functionality is king, but the design of your QR code seriously impacts whether people even bother to use it. A blurry, poorly placed code is just as useless as a broken link. You're aiming for absolute clarity to create a frictionless qr code check in system.
Here are a few design best practices I've picked up over the years:
- High Contrast is Non-Negotiable: Just stick with the classic black code on a white background. While it’s tempting to use brand colors, you risk making it unreadable for smartphone cameras, especially in less-than-perfect lighting.
- Keep It Clean: Don't clutter the scannable area itself with a logo. A much better approach is to frame the QR code with your branding and a clear call-to-action, like "Scan Here for Free Wi-Fi."
- Size It Right and Test It Out: The code needs to be big enough to scan from a comfortable distance. Before you commit to printing 500 of them, do a test run. Print one out and try scanning it with a few different phones to make sure it works every time.
The whole point is an effortless connection. Your QR code's design should be an invitation to scan, not a frustrating puzzle. A clean, clear, and well-placed code is the first handshake in a positive guest interaction.
Platforms built for Authentication Solutions, such as Splash Access, give you the tools to generate these codes easily. They tie them directly to specific Captive Portals or secure methods like IPSK and EasyPSK. For a deeper look into the tech, you can learn more about Cisco Meraki NFC and QR code authentication and see how it all works together.
Strategic Placement for Maximum Engagement
You can have the most beautifully designed QR code in the world, but it's worthless if nobody sees it. The final, crucial step is putting your codes in the right spots. Where that is depends entirely on your venue and how people move through it.
Let's walk through a few real-world scenarios:
Education:
On a university campus, you need to hit the high-traffic, high-dwell-time areas. Think about it:
- Common rooms in student dorms are a perfect spot.
- Put them on tables in the library and student union cafes.
- Include them in welcome packets for new students so they can connect right away.
Retail:
In a store, you can use QR codes to offer Wi-Fi while also nudging customers toward a purchase.
- Place one right at the entrance to welcome shoppers with guest wifi.
- Stick them on displays for big-ticket items, linking to a portal with product specs.
- Use table tents in the food court for easy social login or social wifi access.
BYOD Corporate:
For an office managing visitors, the placement should be professional and convenient.
- A sleek, branded sign on the reception desk is a must.
- Have them ready inside conference rooms for meeting attendees.
- Place them in visitor waiting areas and lounges.
By simply thinking through your guest's journey, you can place QR codes at natural points of interaction. This makes your qr code check in system feel less like a hurdle and more like a helpful, intuitive part of their visit.
Turn Your Guest Wi-Fi into a Marketing Engine
Your QR code check-in system is more than just a way to get people online—it's a direct channel to your customers. When you stop thinking of guest Wi-Fi as a simple utility and start seeing it as a marketing tool, you can build real, lasting relationships. This is where your Cisco Meraki infrastructure, combined with a smart Captive Portal, really comes to life.
The real opportunity emerges when you offer smarter ways to connect. Instead of just a password, think about using social login options. This lets people connect to your guest wifi with a single click using an existing social media profile, and in return, you get valuable, permission-based demographic data.
Connecting with Your Customers on Day One
The true power of social wifi and other login methods isn't just the connection itself; it's what you do with the information afterward. By integrating your Splash Access portal with marketing platforms you already use, you can automate your list-building and start a conversation with visitors the moment they walk through the door.
I've seen this play out in some pretty clever ways across different industries:
- In Retail: A shopper scans a QR code to join your store's Wi-Fi. The second they're connected, an automated email hits their inbox with a 10% discount for their current visit. You’ve just captured a new lead and encouraged an immediate purchase.
- In Education: A prospective student on a campus tour connects to the guest network. They instantly get a message with a link to a virtual tour guide and the day's event schedule, making for a much more engaging and helpful experience.
- For Corporate BYOD: A client checks into your office for a meeting. Once on the guest Wi-Fi, they could be directed to a landing page with your company’s latest news or case studies. It’s a small touch that makes a professional impression while they wait.
Your guest Wi-Fi network is the first digital handshake you have with visitors. Make it a gateway to personalized communication, and you've turned a technical necessity into a strategic marketing asset.
Turning Check-Ins into a Data Goldmine
The sheer scale of this opportunity is staggering. QR code check-ins have completely changed how businesses, especially in hospitality and retail, capture customer data. Globally, QR code scans are projected to hit 1 trillion in 2025 alone.
We've seen campaigns driven by QR codes boost landing page visits by as much as 80%, so the potential for engagement is massive. With a platform like Splash Access, deployment is nearly instant, turning every single check-in into a chance to gather insights.
This data-driven approach helps you understand who is in your space. You can see peak visit times, identify repeat visitors, and collect contact info to nurture them into loyal customers. It’s about so much more than just providing internet access—it’s about opening a direct line of communication. For some creative ideas on this, check out our guide on QR code marketing strategies.
Of course, while we're talking about marketing, the network security underneath it all remains paramount. Your Authentication Solutions, whether it's a simple click-through or a more robust method like IPSK or EasyPSK, are all managed through the same system. This ensures that while you're engaging customers, your network stays secure, keeping guest and corporate traffic completely separate.
Measuring Success and Optimizing Your System
So, your QR code check-in system is live. That's a huge milestone, but the real work—and the real value—is just beginning. Now it's time to dig into the analytics from your Cisco Meraki dashboard and Splash Access portal to see what's actually happening on the ground.
This is where you shift from simply having a system to making it work smarter for you. Instead of guessing, you get to make informed decisions backed by real user data. Don't just glance at the total number of check-ins; the gold is in the details of user behavior.
Key Metrics to Monitor
Right inside the Splash Access portal, you'll find a wealth of data that tells the story of how people are interacting with your network and physical space. Here are a few essential metrics I always tell clients to watch:
- Dwell Times: How long are people actually sticking around in specific zones? In a Retail store, this can tell you which aisles or displays are grabbing the most attention.
- Return Visitor Rates: You want to know if people are coming back. This is a fantastic, no-nonsense indicator of customer loyalty and tells you if your guest Wi-Fi experience is hitting the mark.
- Peak Connection Times: When are things busiest? Knowing this helps you manage bandwidth effectively and gives you a clear picture of daily foot traffic patterns.
Think of this data as a roadmap to a better guest experience. It points out exactly where the friction is and where you have untapped opportunities to improve.
Turning Insights into Action
Data is just a collection of numbers until you do something with it. Let's say you're running an Education campus and notice connection rates are really low in one particular building. That could be a sign of a Wi-Fi dead zone or that you've placed the QR codes where no one sees them. Simple fix, big impact.
Or maybe you’re managing a corporate BYOD environment. Tracking how long guest sessions last can help you dial in your security policies to be practical without being intrusive.
The analytics from your Captive Portal are especially powerful for your marketing efforts. You can see precisely which login methods people prefer—is it social login or a simple email form? This is invaluable information for understanding your audience and measuring marketing campaign effectiveness.
Ultimately, this granular data on attendance and engagement becomes a core part of how you measure event success, giving you solid numbers to justify the investment. By constantly keeping an eye on these metrics, you can start making smart adjustments—moving QR codes, tweaking your portal's design, or refining your overall guest wifi strategy to make sure the system delivers real, measurable value.
Common Questions Answered
When you're looking to roll out a new system like QR code check-in, questions are a good thing. Let's tackle some of the most common ones we hear from organizations setting this up with their Cisco Meraki networks.
Just How Secure Is a QR Code Check-In?
This is usually the first question we get, especially from folks in corporate IT managing BYOD policies or in Education. The answer is: it's incredibly secure, because the QR code is just the starting point.
The real security comes from the powerful Authentication Solutions layered on top of the Meraki infrastructure. Using technologies like IPSK (Identity Pre-Shared Key) or EasyPSK, every single user receives their own unique, private key for network access. This completely segments their traffic from your core network and other guests, stopping any unauthorized access in its tracks.
Think of the QR code as the key to a lobby, but the Captive Portal and IPSK are the security guards who issue a unique, temporary keycard for the right floor.
Can This System Scale for a Large Venue or Campus?
Absolutely. This is where the Meraki architecture really shines. We've seen this system deployed everywhere from a single coffee shop to massive university campuses and stadiums. It's built to handle thousands of people trying to connect all at once.
The combination of Meraki's powerful hardware and a smart captive portal from a partner like Splash Access is designed for high-density environments. It ensures that even during peak times—like halftime at a game or a major conference keynote—the user experience stays smooth and reliable.
What Kind of Guest Data Can We Actually Collect?
This is where your guest Wi-Fi moves from being a simple cost center to a powerful source of insight. The data you can collect depends entirely on the login options you present on your captive portal.
You can offer a few different paths for users to get online:
- Social Login: When users connect with a social media account, you can (with their permission) gain insights into general demographics.
- Simple Forms: A straightforward email or name/email form is a great way to build your marketing list for newsletters and promotions.
This turns your Wi-Fi from a basic amenity into a tool that helps you understand who your visitors are and how to better connect with them.
Ready to see how a simple QR code can unlock a more secure and insightful guest Wi-Fi experience on your Cisco Meraki network? Splash Access ties it all together seamlessly.
You can find out more and get started at https://www.splashaccess.com.


