You've probably been there: the guest Wi-Fi suddenly grinds to a halt, and a flood of complaints from customers or students rolls in. Everyone can see the network, but nobody can connect. More often than not, the culprit is a rogue DHCP server—an unauthorized device that has popped up on your network and is now handing out bad IP addresses, causing a digital traffic jam.
This isn't just a minor inconvenience. It's a critical network failure and a major security headache waiting to happen.
The Hidden Threat Disrupting Your Wi-Fi
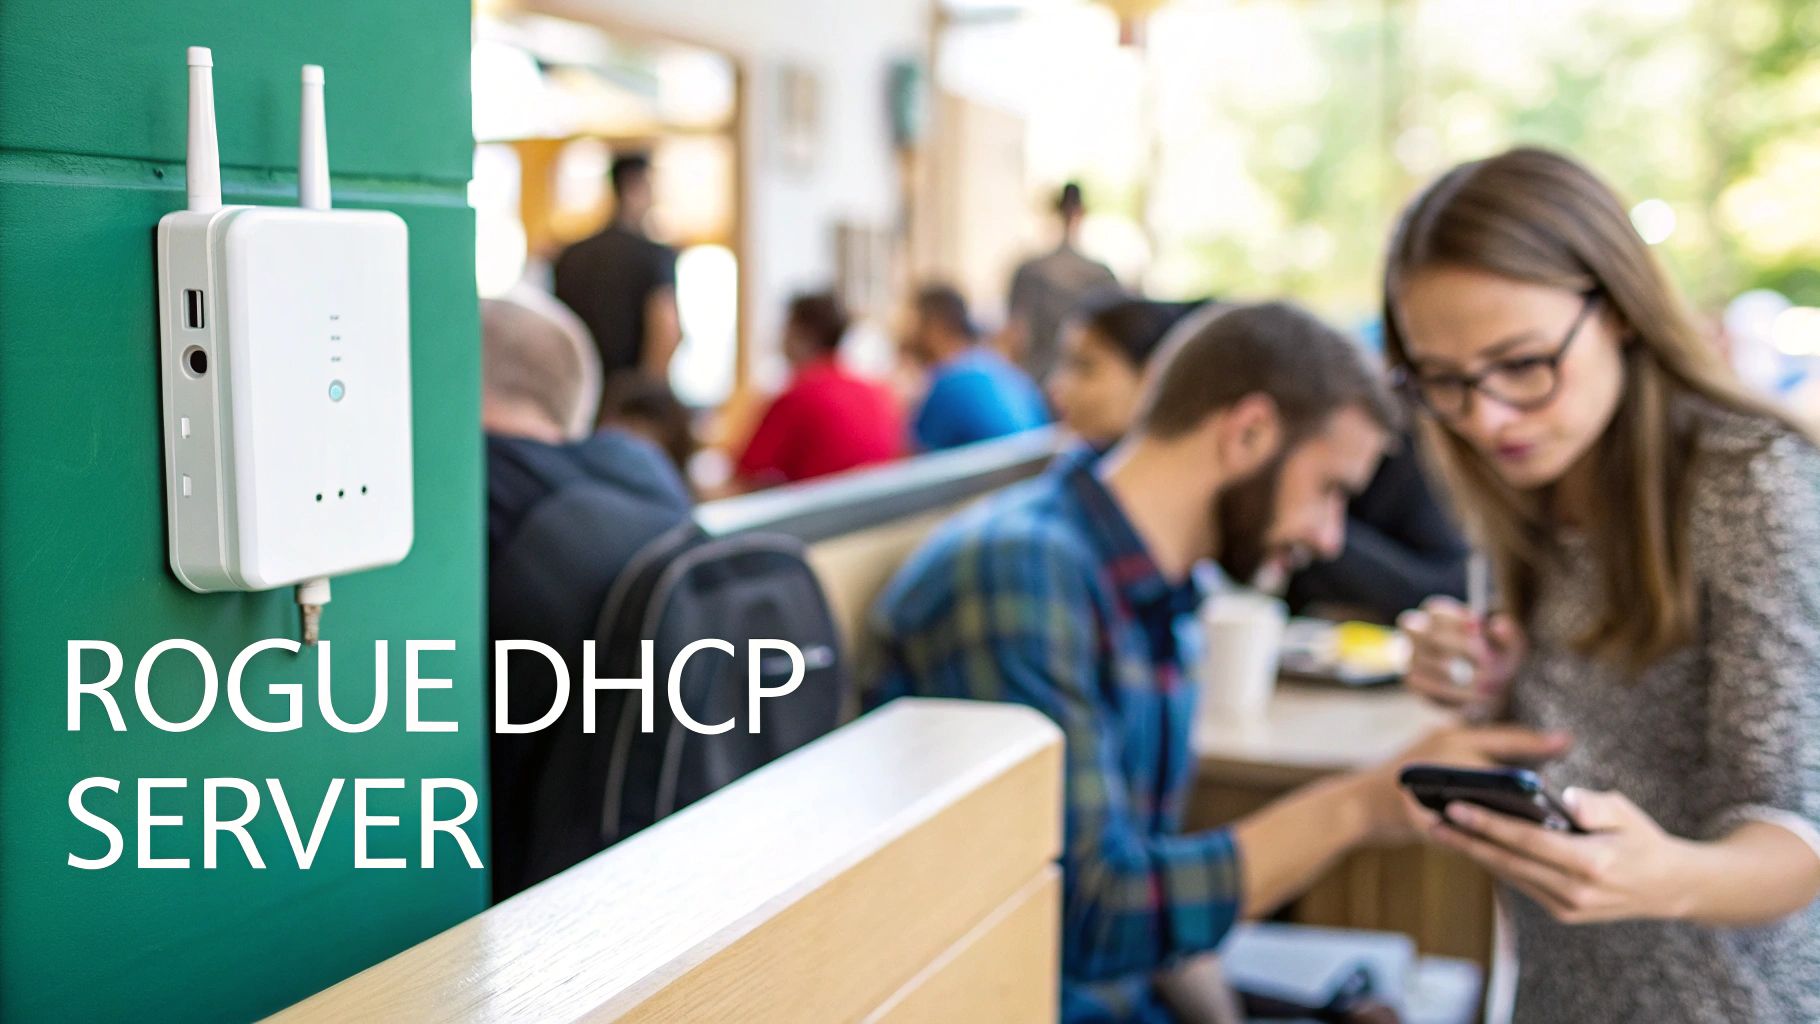
Think of your legitimate DHCP server as the official traffic controller for your network. It’s responsible for giving every device that connects a unique digital address and a map (the DNS settings) to navigate the internet. A rogue DHCP server is like a prankster in a uniform stepping into a busy intersection, waving cars down dead-end streets and causing immediate gridlock.
This unauthorized device starts handing out bogus IP addresses and DNS information, effectively cutting off connectivity for any device that listens to it. In busy places like university campuses, retail stores, or offices with BYOD policies, the chaos is instant. Reliable guest Wi-Fi isn't a "nice-to-have" anymore; it's a core part of the operation.
Why This Matters for Your Organization
The fallout from a rogue DHCP server goes way beyond just connection problems. It can paralyze key functions and ruin the user experience.
- Education: Students can't get to their online coursework or collaborate on projects, bringing learning to a standstill.
- Retail: Shoppers trying to use social login on the guest wifi get stuck, which means they miss out on promotions and you miss out on valuable engagement.
- BYOD Corporate: Employees trying to connect their personal devices can't access essential work apps, and productivity plummets.
A single rogue DHCP device that manages to answer just 5–10% of new DHCP requests can disrupt 50–100 users in minutes. The result? A spike in help desk tickets and a potential doorway for data exposure.
Modern networks, especially those running on Cisco and Meraki gear, are built with sophisticated security layers like Captive Portals and Authentication Solutions. These systems use advanced methods like IPSK and EasyPSK to make sure only the right people get on the network. But a rogue DHCP server can blow a hole right through those defenses by giving devices a configuration that bypasses your security checkpoints entirely.
You might be surprised how often this happens. Industry data shows that rogue or misconfigured DHCP servers are behind a huge chunk of local network problems. Some network management vendors report that up to 15–25% of on-premise DHCP anomalies they track down are caused by an unauthorized device. Spotting these issues early is critical, which is why knowing how to monitor network traffic is such a vital skill for any admin.
Why a Rogue DHCP Server Is a Major Security Risk
A rogue DHCP server is much more than a simple nuisance that knocks people offline. It’s a gaping hole in your network's defenses, giving attackers a powerful foothold. While a network outage is definitely bad for business, the silent, malicious activity happening in the background is the real nightmare. Don't think of it as a misconfiguration; think of it as a weapon.

The most common and dangerous outcome is a Man-in-the-Middle (MitM) attack. In this scenario, the rogue server doesn't just hand out garbage IP addresses. It tells every connecting device that it is the default gateway. Just like that, all internet traffic from unsuspecting users—emails, logins, financial data—is being routed directly through an attacker's machine.
Real-World Attack Scenarios
This isn't just a theoretical threat. It happens in real-world environments every day, turning a helpful amenity into a security liability.
- Education: A student connects to the campus Wi-Fi to check their grades. A rogue DHCP server intercepts their login, giving an attacker access to their entire student profile and personal information.
- Retail: A customer uses the free guest wifi and logs in with their social media account, a common social wifi feature. The attacker grabs those credentials and can hijack their online identity.
- BYOD Corporate: An employee brings their own laptop to the office. The rogue server captures their credentials for company email, cloud storage, and sensitive internal systems.
A rogue DHCP server completely shatters the trust between a user and the network. It turns a simple Wi-Fi connection into a dragnet for data theft, making it a critical threat for any IT team to handle.
Credential theft is just the beginning. Attackers can also redirect users to convincing fake websites—a classic phishing attack. Someone thinks they're logging into a legitimate Captive Portal, but they're actually typing their username and password directly into the attacker's hands. This is precisely why strong Authentication Solutions, like IPSK and EasyPSK, are so essential for networks built on Cisco or Meraki hardware. If you want to dive deeper, it helps to understand what network security is and why it matters.
Bypassing Corporate Defenses
In a corporate setting, especially one with a Bring-Your-Own-Device (BYOD) policy, a rogue DHCP server can easily sidestep established security protocols. For instance, an attacker can push malicious routes to a device, tricking it into sending sensitive company data outside of the secure company VPN.
This isn't just theory. Well-documented exploits show just how effective this technique is. In controlled experiments, attackers have demonstrated the ability to inject malicious routes and begin intercepting traffic from a target device in under 30 seconds. This proves that a rogue DHCP server isn't just an IT headache; it's an active and urgent threat to confidentiality. You can read the full research about these DHCP vulnerabilities to see just how quickly an attacker can move.
How to Spot a Rogue DHCP Server on Your Network
Knowing the risks is one thing, but actually finding the culprit on your network is a whole different ball game. Catching a rogue DHCP server early can be the difference between a minor headache and a full-blown security incident. The good news? You don't have to be a network forensics expert to spot the telltale signs.
The first and most obvious clue is often a sudden flood of user complaints. If your help desk phones start ringing off the hook with students in the library, shoppers in your store, or employees in a BYOD Corporate setting all saying, "I can't get online," a rogue server should jump to the top of your suspect list. They'll probably be able to connect to the Wi-Fi just fine, but that’s where their journey ends.
Listening to Your Network and Users
Beyond the chorus of user complaints, you can look for more specific symptoms right on the client devices themselves. The classic sign is a device getting an IP address that makes zero sense for your network. For example, if your entire network lives on the 10.0.1.x range, but a user's laptop suddenly shows an IP like 192.168.1.100, that’s a massive red flag.
This kind of mismatch often leads to another dead giveaway: IP address conflicts. When users start seeing errors pop up about duplicate IPs, it's a strong hint that two different "traffic controllers" are handing out the same digital addresses. To get a better handle on these issues, it's helpful to understand the common causes behind the conflict of IP addresses on a network.
Keep an eye out for these other warning signs:
- Wrong Gateway or DNS: A device gets a default gateway or DNS server address that's completely wrong, effectively cutting it off from the internet.
- No Connectivity: This is the big one. The user is connected to the Wi-Fi signal, but no websites will load.
- Slow or Spotty Connections: You might see weird, intermittent issues where some devices work and others don't, as the legitimate and rogue servers are in a "race" to answer client requests.
Using the Cisco Meraki Dashboard for Detection
If you’re running a Cisco and Meraki network, the Meraki Dashboard is your best friend for hunting down these rogues. Its event log is an absolute goldmine, giving you a real-time view of everything happening on your network. A simple trick is to filter the event log for "DHCP" events to see exactly which devices are making DHCP offers.
The Meraki interface, as shown above, lets you clearly define your legitimate DHCP server settings. By keeping an eye on DHCP-related events, you can instantly spot any offers coming from an IP or MAC address that doesn't match your authorized setup. This points you right to the unauthorized device—a critical capability in environments using secure Authentication Solutions like IPSK and EasyPSK through a Captive Portal.
Is It a Rogue or Something Else?
Sometimes, different network problems can look frustratingly similar. Is it really a rogue DHCP server, or is your legitimate server just overwhelmed and out of addresses? Here’s a quick way to tell the difference.
| Symptom | Likely Rogue DHCP Server | Likely Other Issue (e.g., DHCP Scope Exhaustion) |
|---|---|---|
| IP Addresses | Devices get IPs from an unknown subnet (e.g., 192.168.x.x on a 10.x.x.x network). | Devices get APIPA addresses (169.254.x.x) because no offers are being received at all. |
| Gateway/DNS | Gateway and DNS settings are incorrect and point to an unknown device. | Devices fail to receive any Gateway or DNS information. |
| Connectivity | Some users can connect, while others on the same Wi-Fi network cannot (intermittent). | All users in a specific VLAN or location fail to connect simultaneously. |
To sharpen your ability to spot these deviations, it helps to understand how a healthy DHCP server should behave. Checking out a practical guide to network provisioning and DHCP options will give you a solid baseline, making it much easier to distinguish normal operations from a genuine threat.
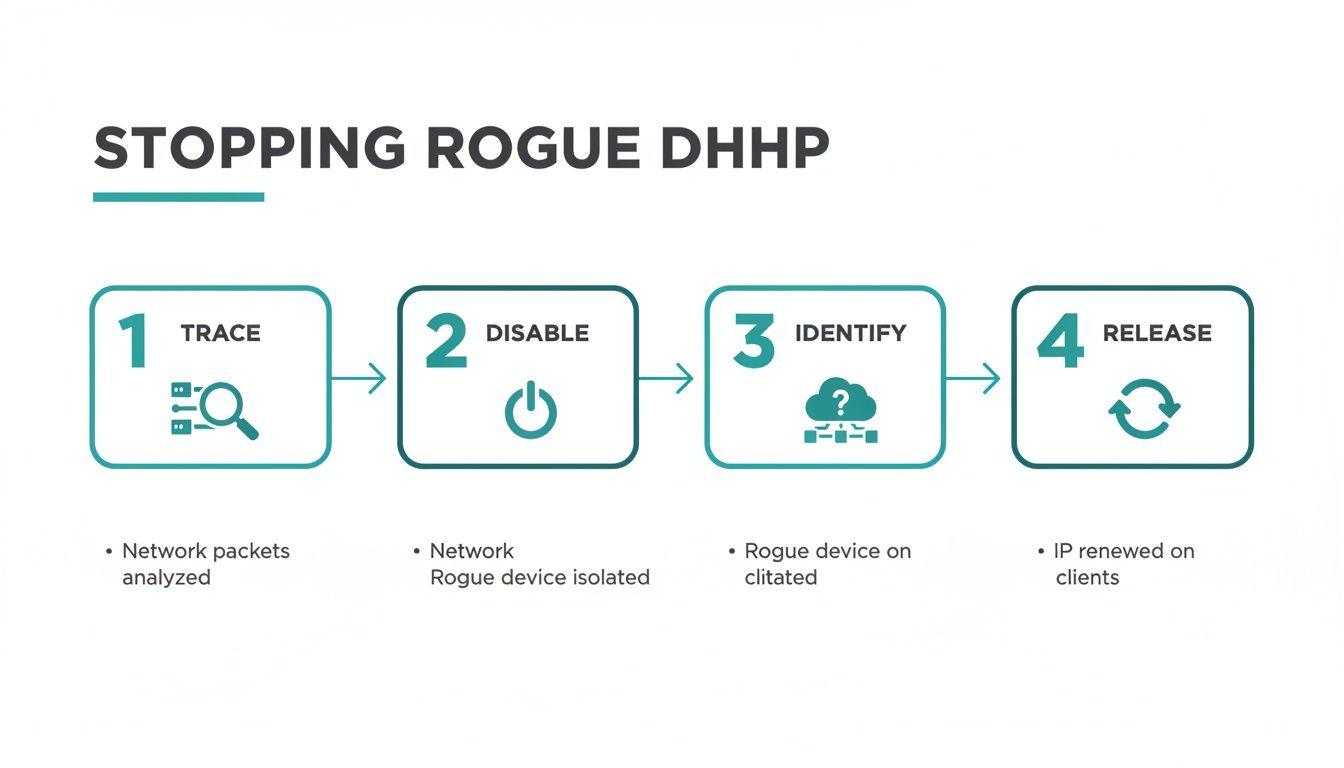
Your Step-by-Step Plan to Stop a Rogue DHCP Server
Once you've confirmed a rogue DHCP server is on your network, every second counts. It's time to shift from detective mode into a calm, structured emergency response. This isn’t about panic; it’s about following a clear plan to neutralize the threat, minimize the disruption, and get your network back in order.
Think of this as your playbook. Following it will turn a potentially chaotic situation into a controlled and documented incident.
Step 1: Trace the MAC Address to a Switch Port
The first move is to translate the digital clues you’ve gathered into a physical location. You should have the MAC address of the rogue device, either from your network scans or the Cisco Meraki dashboard logs. This MAC address is the digital fingerprint that will lead you straight to the source.
Your network switches maintain a crucial directory called a MAC address table. This table maps every connected device's unique MAC address to the specific physical port it's plugged into. By logging into your switch, you can search for the rogue's MAC address.
This search will tell you exactly which switch and which port the unauthorized device is using. In a large environment like an Education campus or a sprawling Retail complex, this step is absolutely essential for narrowing down the device's physical location—be it a classroom, a stockroom, or a tucked-away conference room.
Step 2: Disable the Port and Quarantine the Threat
With the port identified, your next action needs to be swift and decisive: disable it immediately. Think of this as putting up a digital roadblock. By shutting down the switch port, you instantly sever the rogue device's connection to the network.
Shutting down the port is the single most important containment step. It stops the rogue DHCP server from handing out any more bad IP addresses and prevents it from causing further damage.
This one action contains the problem, stopping the bleeding and preventing more users—especially in a BYOD Corporate environment—from being affected. Now that the immediate threat is neutralized, you can breathe and move on to the next phase without the pressure of an ongoing network outage.
If you find your legitimate server is also struggling, it's a good idea to investigate why a DHCP server is not responding to make sure your primary system is healthy.
Step 3: Identify the Source and Document the Incident
With the device offline, it's time for some old-fashioned legwork. Go to the location of the disabled port and find the culprit. More often than not, it’s something innocent—an employee's personal travel router brought from home, a piece of lab equipment that was misconfigured, or even a student's gaming console.
However, you have to consider the possibility of a malicious attack. Was the device intentionally placed to intercept traffic, perhaps to bypass your Captive Portals or other Authentication Solutions? Document everything you find. Take note of the device type, where it was, and who it belongs to. This information is critical for your incident report and for preventing it from happening again.
Step 4: Force Clients to Renew Their IP Addresses
Finally, you need to clean up the mess left behind. Any client device that received an IP address from the rogue server is still stuck with bad information. You need to force them to release their invalid IP and request a new, correct one from your legitimate DHCP server.
You can often trigger this remotely through network management tools. For individual devices, a simple restart or running a command to release and renew the IP configuration will do the trick. As devices get back online with valid addresses, you'll see connectivity restored across the board—from the social Wi-Fi login in a retail store to the IPSK-secured network in a corporate office.
Your Best Defense Is Proactive Prevention
Reacting to a network fire is one thing, but fireproofing the building is a much better strategy. The same logic applies to a rogue DHCP server. The most effective approach isn't just knowing how to hunt one down—it's building a network where one can't get a foothold in the first place.
This is especially true in environments buzzing with activity, like Education campuses, Retail stores, and BYOD Corporate offices, where countless unmanaged devices connect daily. Shifting from a reactive to a proactive mindset isn't just about saving your IT team a massive headache; it's about protecting every user and every piece of data from the moment they connect.
While the steps below are crucial for when things go wrong, our goal is to make them a last resort.
Knowing how to trace and disable a rogue device is a vital skill, no doubt. But engineering your network so that unauthorized DHCP offers are dead on arrival? That's the real win.
Your Network Bouncer: DHCP Snooping
One of the most powerful tools in your prevention arsenal, especially if you're working in a Cisco or Meraki environment, is DHCP Snooping. Think of it as a bouncer at the door of your network club. Its one and only job is to check IDs (in this case, DHCP messages) and make sure only legitimate servers get to talk.
When you enable DHCP Snooping on your switches, you essentially create a very simple rulebook. You designate specific switch ports as "trusted"—these are the ports connected to your real, legitimate DHCP server. Every other port, where students, shoppers, or employees plug in their devices, is automatically considered "untrusted."
Now, if a device on an untrusted port suddenly tries to hand out IP addresses, the switch sees it, knows it's not coming from a trusted source, and immediately drops the traffic. The rogue offer never even reaches other clients. The threat is neutralized before it can cause any harm.
DHCP Snooping acts as a fundamental layer of defense. By creating a simple "trust" boundary at the port level, it effectively filters out unauthorized DHCP traffic, making it one of the most reliable methods for preventing rogue server incidents.
This feature is a game-changer because it stops both accidental misconfigurations and malicious attacks cold. It doesn't rely on complex analysis; it's a straightforward rule that says, "Only my official DHCP server gets to speak here."
The Power of Segmentation and Strong Authentication
Looking beyond the switch level, how you manage your Wi-Fi access plays a massive role in prevention. This becomes absolutely critical for guest wifi and BYOD scenarios, where you have virtually no control over the devices joining your network. The key here is proper network segmentation—drawing a hard line that keeps guest traffic completely separate from your internal corporate network.
This is where tools like Captive Portals and modern Authentication Solutions really shine. A well-configured captive portal acts as a secure gateway, forcing users to authenticate before they're granted any meaningful network access. This step alone ensures you have a record of who is connecting.
For instance, using authentication methods like IPSK (Individual Pre-Shared Key) or EasyPSK creates a far more secure environment than a single, shared Wi-Fi password that everyone knows. By giving each user or device its own unique key, you severely limit an attacker's ability to even get on the network to launch an attack. In a retail setting, this secure onboarding can be blended with a smooth social login or social wifi experience, striking a perfect balance between security and convenience.
Proactive prevention against network threats, including rogue DHCP servers, involves implementing a range of comprehensive essential security solutions for businesses. These layers work in concert to create a truly formidable defense.
Comparing Rogue DHCP Prevention Methods
To put this all into perspective, different prevention techniques have varying levels of effectiveness depending on the network environment. The table below compares some of the most common methods.
| Prevention Method | Best For | Effectiveness | Key Benefit |
|---|---|---|---|
| DHCP Snooping | Wired Networks (Cisco, Meraki) | Very High | Blocks rogue offers at the switch port level before they can propagate. |
| Network Segmentation | All Environments (Corporate, Guest) | High | Isolates traffic, containing the impact of a rogue server to a small network segment. |
| Port Security | Wired Corporate Networks | Medium | Limits the number of MAC addresses on a port, preventing unauthorized device connections. |
| Strong Wi-Fi Auth (IPSK/802.1X) | Wireless Networks (BYOD, Guest) | High | Prevents unauthorized devices from joining the network in the first place. |
| Regular Network Audits | All Environments | Medium | Catches misconfigurations and unauthorized devices that other methods might miss. |
Ultimately, a layered approach is always the most resilient. Combining an access-layer control like DHCP Snooping with strong Wi-Fi authentication and network segmentation closes the most common entry points for rogue servers.
Building a Secure Network for Guests and BYOD
When it comes to stopping a rogue DHCP server, there's no single magic bullet. It all comes down to building a strong, layered defense. As we've seen, just one unauthorized device can completely trash the user experience and blow a hole in your network's security, turning a simple convenience into a massive headache.
This threat is bigger than ever. Think about environments like university campuses, Retail stores, and corporate offices with BYOD policies—they're practically magnets for unmanaged devices. Every single student, shopper, or employee who jumps on your guest wifi is a potential door for trouble to walk right in.
This is exactly why having solid network access control has moved from being a "nice-to-have" to an absolute necessity.
The real secret to network security is combining top-tier hardware from vendors like Cisco Meraki with smart Captive Portals and modern Authentication Solutions. This partnership creates a powerful barrier that keeps unauthorized devices out.
By turning on preventative tools like DHCP Snooping, you establish an initial checkpoint that filters out bad actors from the start. When you add strong authentication methods like IPSK or EasyPSK on top of that, you guarantee that only trusted users and devices can even get on the network.
For your guest network, you can build on this secure foundation with user-friendly features like social login and social wifi. This lets you provide a fantastic experience without cutting corners on safety. Our guide on how to set up guest wifi securely can help you find that perfect balance.
In the end, a secure network really comes down to a simple formula: know the threat, be proactive with your prevention, and have a clear plan for when things go wrong. Taking these steps means you can confidently protect your users, your data, and your organization from this sneaky but serious network threat.
Still Have Questions About Rogue DHCP Servers?
If you're still wrapping your head around the rogue DHCP server threat, don't worry. It's a common but often misunderstood problem. Let's clear up a few of the most frequent questions we hear from network admins.
What Exactly Is a Rogue DHCP Server?
Imagine your network’s official DHCP server is a helpful librarian, methodically assigning a unique call number (an IP address) to every book that comes in. A rogue DHCP server is like someone else sneaking in and slapping random, incorrect labels on everything.
It's an unauthorized device on your network—often a misconfigured router or a malicious actor's laptop—that starts handing out its own set of IP addresses, gateways, and DNS settings. The result is pure connectivity chaos.
Why Is This Such a Big Deal for Guest Wi-Fi?
For places like Retail stores or Education campuses that depend on guest wifi, a rogue DHCP server can be catastrophic. Think about it: a customer can't use the social login on your Captive Portal, or a student is blocked from accessing their online coursework.
Suddenly, that helpful guest network becomes a source of frustration. Worse, a malicious rogue can intercept credentials, turning your Wi-Fi from a welcome amenity into a serious security hole.
How Do I Know If I Have a Rogue and Not Just Another Network Problem?
The biggest giveaway is seeing strange IP addresses pop up. If your network is standardized on the 10.10.x.x range but devices suddenly start getting 192.168.1.x addresses, you almost certainly have a rogue.
Another classic symptom is patchy connectivity. If some users are online just fine while others on the exact same Wi-Fi network can't connect, it often means the rogue and your real server are in a race to see who can respond to DHCP requests first.
Key Takeaway: Your best defense is a proactive one. Features like DHCP Snooping, available on Cisco and Meraki switches, act like a bouncer at the door. They only allow DHCP offers from your pre-approved, trusted servers and immediately block any others.
Can Better Authentication Stop This?
Absolutely. Strong Authentication Solutions are a huge part of the puzzle. In a BYOD Corporate environment, for example, using methods like IPSK or EasyPSK is a game-changer.
These methods ensure that only authorized devices can join the network in the first place. If an attacker can't even get their rogue device connected to your Wi-Fi, their attack is over before it begins.
What Is the First Thing I Should Do If I Find One?
Speed is everything. Once you've tracked down the rogue device's MAC address—your Meraki dashboard or a good network scanner is perfect for this—your immediate goal is to find which switch port it's plugged into.
Log into your switch, find that port, and shut it down. Instantly. This quarantines the device and stops the damage, giving you the breathing room to figure out where it came from and why it was there.
At Splash Access, we build secure, intelligent Wi-Fi experiences that go beyond just a login screen. Our platform integrates tightly with Cisco Meraki, providing robust captive portals and advanced authentication that help shield your network from threats like rogue DHCP servers, all while giving your users a seamless connection. Check out our solutions at https://www.splashaccess.com.


