Hey there! Offering guest WiFi isn't just a nice-to-have anymore—it’s a baseline expectation in today's connected world. But opening your network up to visitors can also open the door to some serious risks. That's where Cisco Meraki URL filtering comes in, acting as your network's essential, friendly gatekeeper against malware, phishing scams, and other digital nasties.
Think of it as the first line of defense for keeping your network secure, reliable, and running smoothly for everyone.
Why Meraki URL Filtering Should Be Your Go-To Solution
Whether you're running a bustling retail shop, a corporate office with a BYOD policy, or a sprawling school campus, great internet access is non-negotiable. The catch? An unprotected network is a playground for security holes and productivity killers. This is exactly where the Cisco Meraki URL filtering proves its worth.
It's essentially a digital bouncer for your network. Powered by the massive threat intelligence database of Cisco Talos, the system automatically blocks access to sketchy or inappropriate websites before they ever become a problem. It’s not just about stopping attacks; it's about building a safe, productive online environment for every single person who connects, from students to shoppers to employees.
Building a Secure and User-Friendly Experience
Solid URL filtering is the bedrock of a trustworthy network, but it really shines when you pair it with a smart authentication solution. This one-two punch is key to managing access securely, especially when you're dealing with different types of users across sectors like Education, Retail, or a corporate BYOD environment.
Let's look at a few real-world examples:
- Retail and Hospitality: Combine URL filtering with a captive portal to offer a simple social WiFi login. Guests get online fast using their social media accounts, and you can rest easy knowing their browsing is filtered, protecting both them and your business from harm. This is a huge part of creating a great guest WiFi experience.
- Education: Schools need to create different access tiers. You might lock down student access with strict filtering while giving faculty more freedom. A truly safe campus requires a comprehensive cybersecurity for schools plan, and URL filtering is a cornerstone of that.
- Corporate BYOD: In an office, you can use more advanced authentication solutions like IPSK or EasyPSK to assign specific filtering rules based on a user's role. This is a great way to keep productivity high by blocking time-wasting sites on personal devices connected to the company network.
When you combine strong filtering policies with authentication, you shift your guest WiFi from a potential liability into a secure, well-managed asset. It all comes down to controlling who gets on your network and what they can do once they're connected.
This proactive stance is worlds better than trying to clean up a mess after a security incident. Integrating these Cisco tools gives you incredibly granular control over network access. At the end of the day, Meraki URL filtering delivers the peace of mind that comes from knowing your network, users, and data are protected.
Getting Your First Meraki URL Filtering Policy Live
Alright, let's roll up our sleeves and get your first Meraki URL filtering policy built. The best part? The Cisco Meraki dashboard is refreshingly straightforward, so you can lock things down without needing a Ph.D. in network engineering. We'll walk through setting up a practical policy, whether you're managing a coffee shop, an education campus, or a corporate office with a bring-your-own-device (BYOD) policy.
The whole game plan is to start broad with category-based filtering and then get surgical with specific allow and block lists. This layered approach is incredibly powerful but keeps the day-to-day management from becoming a headache.
Finding Your Way Around the Content Filtering Dashboard
First things first, you need to know where to go. In your Meraki dashboard, you'll find everything you need under Security & SD-WAN > Content filtering. This is mission control for dictating what kind of web traffic is welcome on your network.
Right away, you'll see the options for category-based filtering. These are essentially pre-built, constantly updated lists of websites curated by Cisco's security team. This saves an unbelievable amount of time compared to the old-school method of trying to block every bad site on the internet one by one.
This isn't just a simple blocklist; it's backed by the serious muscle of Cisco Talos Intelligence, one of the largest commercial threat intelligence teams in the world. This powerful backing means your network is always protected against the latest threats. You can dive deeper into how this works by checking out the official URL filtering documentation.
A Real-World Example: Filtering for a Retail Store
Let’s bring this down to earth. Imagine you're setting up Wi-Fi for a retail store. The goal is simple: protect shoppers from sketchy sites and stop people from using the network for things they shouldn't, all while making sure your social WiFi login via your captive portal works perfectly.
You'll want to start by blocking the high-risk categories. A great baseline includes:
- Threat Categories: This is non-negotiable. Always block Malware sites, Phishing and Deception, and Command and Control Callbacks. Consider this your first line of defense.
- Content Categories: For a public network, it's a good idea to block Adult Content, Illegal Activities, and Gambling.
- Bandwidth Hogs: To keep the network from grinding to a halt, think about blocking Peer-to-peer and High Bandwidth categories.
Pro Tip: One of the most common mistakes I see is going overboard with blocking right out of the gate. Start with the essentials. It's much easier to add more restrictions later based on reports than it is to troubleshoot why a customer's favorite blog is suddenly blocked.
Once you’ve made your selections, you just apply them. The dashboard gives you a clean overview of what you’ve chosen, so you can double-check everything before hitting save.
This screenshot from the dashboard shows just how clean the interface is, with 'Website content categories' and 'Threat categories' separated for more precise control.
See how easy it is to just tick the boxes? That user-friendliness is a huge part of Cisco Meraki's appeal.
Fine-Tuning with Allow and Block Lists
Category filtering gets you 90% of the way there, but what about the exceptions? That's what allow and block lists are for. The allow list is your "VIP pass"—anything on this list gets through, no matter what other rules say. This is absolutely critical for making sure captive portals and other essential services don't break.
For our retail store, you would add the domains for your social login providers here. If you’re using a captive portal with a social login option, you have to whitelist the domains for Facebook, Google, etc. If you forget this step, the category filter might block the authentication page, and your guests won't be able to get online. A smooth guest Wi-Fi experience is a big deal, and we cover more of the essentials in our guide on how to set up guest WiFi properly.
The block list is the opposite. It’s for specific URLs you need to shut down immediately that might not be in a category yet. Maybe a new bandwidth-sucking gaming site just popped up. Add its URL to the block list, and you've solved the problem. By blending broad categories with these precise allow/block lists, you build a Meraki URL filtering policy that's both tough on threats and easy on your users.
Advanced Filtering for Guest WiFi and Captive Portals
Once you’ve got the basics down, you can really start to see how powerful Meraki URL filtering can be, especially when you bring advanced authentication solutions into the mix for your guest WiFi. This is where things get interesting. By tying your filtering rules directly to a captive portal, you can create a user experience that’s not just secure, but also perfectly tailored to your business needs, whether in education, retail, or a BYOD corporate setting.
Different environments have wildly different requirements. A university, for instance, needs to give students and faculty different levels of access on the same network. A retailer might want to offer a quick social WiFi login for shoppers while keeping their internal network completely locked down. With Meraki's group policies, this kind of granular control isn't just possible—it's surprisingly straightforward.
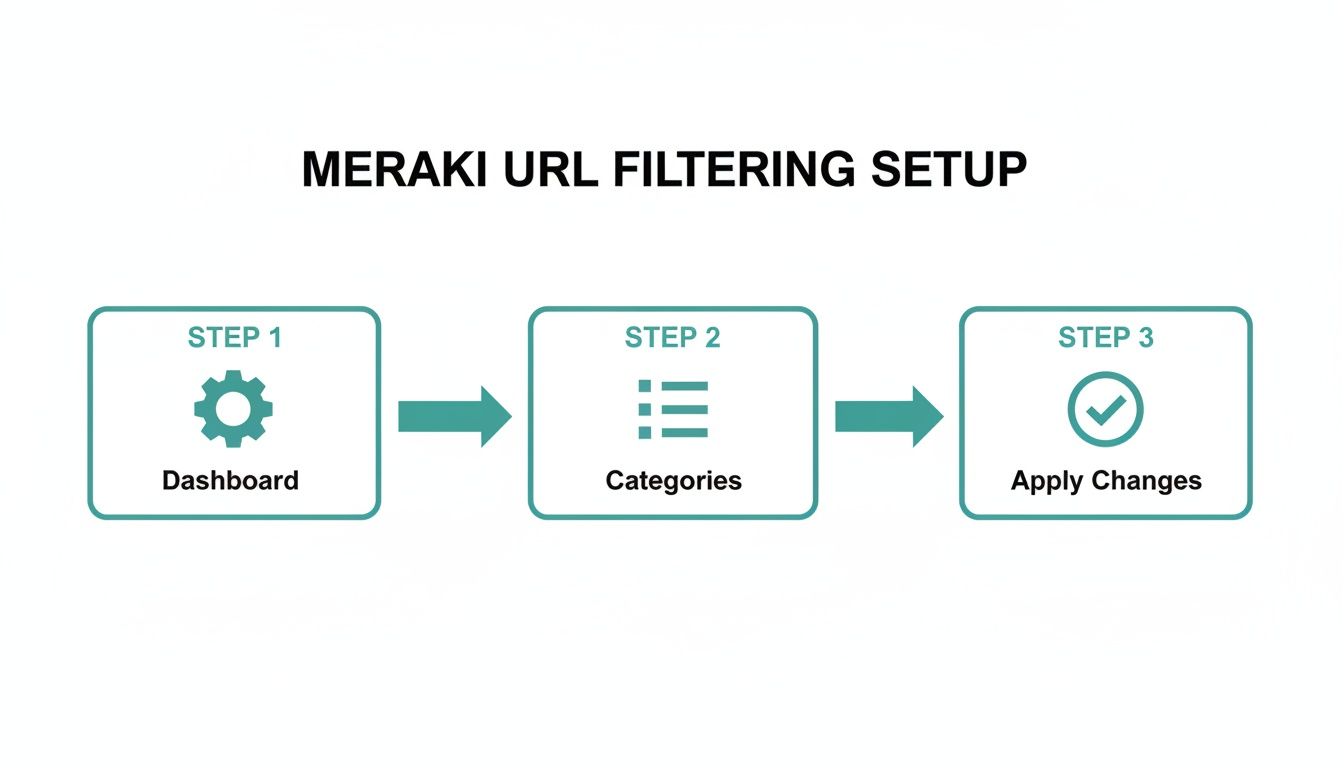
This graphic breaks down the essential workflow inside the Cisco Meraki dashboard. No matter how complex your policies get, it all comes back to these core steps: get to the right dashboard section, pick your categories, and save your changes.
Connecting URL Filtering with Authentication Solutions
Here's the real pro move: applying filtering rules based on how a user authenticates. We're talking about using tools like captive portals, Identity Pre-Shared Keys (IPSK), and EasyPSK. Instead of a blunt, one-size-fits-all policy, you can build a smarter, layered approach to network security.
Let's look at how this plays out in the real world:
- In Education: Students might hit a simple captive portal and get a strict filtering policy that blocks social media and gaming. Faculty, however, could use their IPSK or network credentials, which lands them on a policy with far fewer restrictions, giving them the access they need for research.
- In Retail and Hospitality: A shopper using a social login gets a policy that allows social media (it has to for the login to work!) but blocks known threats and bandwidth hogs like video streaming. Meanwhile, staff connect using EasyPSK and get a totally different policy designed for business operations.
- In a BYOD Corporate Setting: Employees bringing their own devices can be placed into a group policy that restricts time-wasting sites during work hours. Company-owned devices? They get a much more open policy.
This turns your guest WiFi from a simple amenity into an intelligent, context-aware service. If you want to get deeper into how these login pages function, our guide on the captive portal for WiFi is a great place to start.
Don't Forget to Whitelist for a Smooth Login
I've seen this trip people up countless times. One of the most common mistakes when combining URL filtering with a captive portal is accidentally blocking the login process itself. Think about it: if you're offering social login with Facebook or Google, the user’s device has to be able to talk to those authentication servers before they're officially on your network.
If your content filter is set to block the "Social Networking" category, you've just created a catch-22. The user tries to log in, your filter blocks the request, and they’re stuck. It’s incredibly frustrating and often leads to a support call.
This is where whitelisting is non-negotiable. You absolutely must add the specific domains for your social login providers and your captive portal service to the "Allow list" within your Meraki URL filtering configuration. This essentially creates a VIP lane for authentication traffic.
The allow list always overrides any block rules. This ensures that no matter how restrictive your general policy is, the critical services needed for a seamless login will always get through. It’s a small configuration detail that makes a world of difference for the end-user experience.
Crafting Policies for Education, Retail, and Corporate BYOD
Effective Meraki URL filtering isn’t a one-size-fits-all solution. The real magic happens when you build policies that understand the world they operate in. A set of rules designed for a corporate headquarters would be a disaster in an education environment, and what works for a school just won’t cut it for a busy retail store.
Let's dig into how to build smart, sector-specific filtering strategies. The goal is always the same: balance robust security with a great user experience, whether that user is a student, a shopper, or an employee.
Filtering for the Modern Classroom
In any education setting, the number one priority is creating a safe online environment that actually helps students learn. This means walking a fine line between blocking genuinely harmful content and accidentally cutting off access to valuable educational resources. The stakes are high, especially with compliance standards setting a strict baseline.
Your focus here has to be on building a secure digital sandbox. Start with the non-negotiables:
- High-Risk Content: Your first move is to block categories like Adult Content, Malware sites, Phishing and Deception, and Illegal Activities. Think of this as the foundation of your security.
- Common Distractions: To keep students focused, it’s smart to block categories like Gaming, Social Networking, and Peer-to-peer file sharing, at least during school hours.
- Compliance Checks: Double-check that all categories that would violate local regulations are blocked. This is crucial for maintaining a safe and compliant environment.
A classic mistake I see in schools is being overzealous and blocking broad categories like "Forums" or "Blogs." This can inadvertently prevent students from accessing legitimate academic discussion boards or research materials. Always start with the essentials and then fine-tune based on real-world usage.
The global adoption of Meraki URL filtering underscores its impact, especially in education. Campuses have seen significant reductions in policy violations after implementing these systems. This effectiveness is constantly improving, thanks to the power of the Cisco Talos intelligence engine. For a deeper dive into the technology, you can check out Cisco's content filtering advancements.
Securing the Retail and Guest WiFi Experience
For retailers, it's all about the customer. Your guest WiFi has to be fast, secure, and incredibly simple to get onto. This is where combining URL filtering with a captive portal and social WiFi login creates a seamless experience. The goal is to shield shoppers from malicious sites without making them jump through hoops just to connect.
Here, the priority is invisible security. Your policy needs to block threats that could put shopper data at risk but allow everything needed for a quick social login.
- Prioritize Social Logins: Your allowlist is your most important tool here. You absolutely must whitelist the domains for Facebook, Google, or any other social login provider you use.
- Block Obvious Risks: It's non-negotiable to block Malware sites and Phishing and Deception. This protects both your guests and your brand's reputation.
- Protect Your Bandwidth: To keep the network snappy for everyone, block High Bandwidth streaming services. This stops one or two people from hogging all the bandwidth and ruining the experience for everyone else.
URL Filtering Policy Templates by Sector
Creating a policy from scratch can be daunting. Based on what works in the real world, here are some practical templates you can adapt for your specific environment.
| Sector | Recommended Categories to Block | Recommended Categories to Allow/Whitelist | Key Objective |
|---|---|---|---|
| Education | Adult Content, Malware, Phishing, Gaming, Social Networking (during school hours), Peer-to-peer | Specific educational domains (e.g., learning platforms), learning management systems | Compliance and creating a safe, distraction-free learning environment. |
| Retail Guest WiFi | Malware, Phishing, Peer-to-peer, High Bandwidth | Social login domains (Facebook, Google), your company website, local attraction sites | Provide a secure and fast WiFi experience while protecting customers and network performance. |
| Corporate BYOD | Proxy & Anonymizers, Peer-to-peer, Social Networking (during business hours), Personal Cloud Storage | Corporate-sanctioned SaaS applications, productivity tools, partner websites | Protect corporate data, prevent productivity loss, and secure personal devices on the network. |
These templates are a great starting point. Remember to monitor usage and user feedback to fine-tune your policies over time for the best results.
Smart Policies for Corporate BYOD
In a corporate setting with a Bring Your Own Device (BYOD) policy, the challenge is different. You need to secure personal devices accessing the company network without being overly intrusive. The focus is on protecting company data and keeping employees productive. This is the perfect use case for advanced authentication solutions like IPSK or EasyPSK.
By assigning different group policies based on how a device authenticates, you can apply stricter filtering to personal phones and tablets while giving company-managed laptops more freedom. This granular control is a core strength of managing modern wireless access control systems with Cisco Meraki.
For a policy aimed at BYOD, think about blocking:
- Productivity Drains: Categories like Social Networking, Online Shopping, and non-work-related Streaming Video can be easily restricted during business hours.
- High-Risk Services: Always block Peer-to-peer and Proxy and Anonymizers. These are common ways for users to bypass security policies and introduce threats.
- Data Exfiltration Risks: You might want to block access to personal cloud storage or webmail on certain devices to prevent sensitive company data from walking out the door.
By tailoring your Meraki URL filtering rules to the specific context of your organization, you graduate from simple web blocking to creating a truly intelligent and secure network.
Monitoring, Reporting, and Troubleshooting Common Issues
So, you’ve built your filtering policies and assigned them to your guest and corporate SSIDs. What now? Well, the job isn't done until you know if those policies are actually working as intended. Setting up your Meraki URL filtering is just the first part; the real value comes from monitoring the results and knowing how to fix the little hiccups that will inevitably pop up.
This is where the Cisco Meraki dashboard becomes your best friend. It’s designed to turn raw data into actionable security insights, giving you a clear window into what’s happening on your network. Think of it as a health check for your security posture.

Unlocking Insights with Security Reports
Inside the Cisco Meraki dashboard, you’ll want to head straight to the Security Reports section. This isn't just some boring log file; it's a visual breakdown of threats and policy violations. In seconds, you can see which categories are being blocked most often and which specific devices are triggering these blocks.
This data is gold. For instance, if you see a huge number of blocks in the "Malware sites" category, that’s a clear win—your policy is actively protecting users. On the other hand, if you notice a spike in attempts to access blocked social media sites during work hours, you have the data to justify your policy to management. It’s all part of understanding user behavior, a topic we cover more broadly in our guide on how to monitor network traffic.
This visibility gets even more powerful when you’re using authentication solutions like IPSK or EasyPSK. You can filter the reports by group policy to see exactly how the rules for students, retail guests, or corporate staff are performing.
Handling Common Troubleshooting Scenarios
No filtering system is perfect. You’ll definitely run into situations where a quick adjustment is needed. The good news is that most common problems are pretty easy to fix right from the Cisco Meraki dashboard.
Let's look at a frequent issue: a legitimate, business-critical website gets blocked by mistake. These "false positives" can be frustrating for users, but resolving them is straightforward.
- Identify the Block: First, jump into the Event Log. It will show you the exact URL that was blocked and, more importantly, why it was blocked (the category it was matched against).
- Add to the Allow List: If the site is important, the fastest fix is to add its domain to your allow list. Just remember, the allow list always overrides any block rules, giving you an immediate solution.
- Report the Mismatch (Optional): If you’re confident the site is fundamentally miscategorized by Cisco Talos, you can submit a request to have it re-evaluated. This helps improve the system for everyone in the long run.
It's a balancing act. You want filtering to be tough on threats but flexible enough not to disrupt legitimate activity. Your allow list is the key to achieving that balance, especially in dynamic environments like education or retail where needs can change on a dime.
Why Is My Social Login Page Blocked?
Here’s a classic problem that pops up all the time when integrating with captive portals. Users report they can't get to your social WiFi login page, and the culprit is almost always the URL filter itself. This happens when the "Social Networking" category is blocked and you've forgotten to add the specific domains needed for authentication (like Facebook, Google, etc.) to your allow list.
This scenario really highlights why a properly configured allow list is so critical. It’s the bridge that ensures your security measures don't accidentally break the very services that make your guest WiFi so valuable.
The technical strength of Meraki URL filtering is built for these complex scenarios. By regularly keeping an eye on your reports and knowing these simple troubleshooting steps, you can keep your network secure, your policies effective, and your users happy.
Got Questions About Meraki URL Filtering?
When you're knee-deep in setting up Meraki URL filtering, a few questions always seem to pop up. Let's walk through some of the most common ones we hear from folks in the field to clear up any confusion and help you avoid common pitfalls.
Can I Set Up Different Filtering Rules for Different People?
You absolutely can, and you should. This is where the power of Cisco Meraki really shines, particularly when you combine it with intelligent authentication solutions. The magic happens inside Meraki's Group Policies, which let you dish out completely different filtering rules based on who is connecting and how.
Think about a typical corporate office with a BYOD policy. On a single SSID, you could easily have:
- Guest Users: They connect through a captive portal using a social login. Their policy is tight, blocking streaming services and known security risks to keep the network clean.
- Employees: They authenticate with IPSK or EasyPSK. Their policy is much more open, giving them access to the cloud apps and resources they need to do their jobs.
This kind of granular control isn't just a nice-to-have; it's essential for places like schools, retail stores, and corporate offices where you have diverse groups of people sharing the same Wi-Fi.
What's the Real Difference Between Category Filtering and a Manual Blocklist?
It really comes down to using a wide net versus a precision tool.
Category filtering is your wide net. It lets you block entire buckets of websites—think 'Malware Sites' or 'Adult Content'—that are curated and continuously updated by Cisco Talos's security team. It’s the most efficient way to lay down a strong security foundation without having to hunt down every single questionable URL yourself.
A manual blocklist, on the other hand, is your precision tool. You use it to block specific, individual websites. Maybe it's a site that isn't categorized yet or one that's become a notorious time-waster for your team.
Pro Tip: Don't choose one over the other. The best strategy is to use both. Let category filtering do the heavy lifting, then use your manual blocklist for surgical strikes on any specific sites that slip through or need special attention.
How Do I Stop My Own Captive Portal from Being Blocked?
This is easily one of the most frequent—and frustrating—hiccups we see. It’s a classic setup mistake that leaves guests staring at a "blocked page" message instead of your login screen.
The fix is simple: your whitelist (or "Allow list"). This list is your golden ticket. Any domain on it bypasses all your other category and block rules, no questions asked.
To guarantee a smooth login experience, you have to add the domains for your captive portal and any social WiFi providers (like Facebook, Google, or X) to this whitelist. This allows devices to hit those authentication pages before the user is actually on the network. Your captive portal provider, like Splash Access, can give you the exact list of domains you need to add. It's a small step that makes a world of difference for your users.
At Splash Access, we live and breathe this stuff. We build seamless and secure guest WiFi experiences that plug right into Cisco Meraki, giving you powerful authentication and filtering tailored for your specific needs, whether in Education, Retail, or a Corporate BYOD environment.
Ready to see it in action? Head over to the Splash Access website to learn more.


