Ever walked into a hotel, retail store, or a campus, connected to the Wi-Fi, and got online almost instantly? That seamless experience isn't an accident. It's the result of two fundamental network services working in perfect harmony: the DNS and DHCP server. They're the invisible workhorses that make every modern internet connection possible, especially on powerful hardware from Cisco and Meraki.
The Unsung Heroes of Your Wi-Fi Connection
Let's demystify what's happening behind the curtain. Think of DHCP as the friendly host at a restaurant. When your device arrives (tries to connect), DHCP greets it and assigns it a temporary table, or in this case, an IP address. Then, DNS acts as the network's universal translator, converting the human-friendly website names you type (like Google.com) into the numerical IP addresses that computers understand.
In this guide, we’ll go beyond the textbook definitions. We'll explore why getting your DNS and DHCP server setup right is mission-critical for building a secure, reliable, and user-friendly guest Wi-Fi network, especially when using powerful hardware like Cisco Meraki. From setting up a simple captive portal with social login to securely onboarding thousands of personal devices in a large enterprise, it all starts here.
Why DNS and DHCP Matter for Modern Guest Wi-Fi
In today's connected world, managing a DNS and DHCP server has evolved from a simple IT chore into a strategic business function. These services are the bedrock of any modern authentication solution and are absolutely essential for delivering a great user experience.
- Captive Portals: They are what make captive portals work, smoothly redirecting new users to a branded splash page where they can log in via social wifi or accept your terms of service. This is a game-changer for Retail and guest networks.
- Secure Onboarding: For businesses and schools in the Education and BYOD Corporate sectors, they enable crucial security protocols like IPSK and EasyPSK to get everyone connected safely.
- Scalability: In a high-traffic environment like a shopping mall or university, these servers automatically manage a massive volume of connections, eliminating the need for manual network configuration.
This isn't just a niche corner of IT; it's a massive, growing industry. The global market for DNS, DHCP, and IPAM (DDI) was valued at USD 561.15 million and is expected to explode to USD 1,896.94 million by 2032. What's driving this growth? The sheer volume of IoT devices and the widespread move to cloud services, all of which underscores just how vital these services are for managing the thousands of guest wifi connections that businesses see every single day. You can learn more about DDI market projections on 360iResearch.
DHCP and DNS: The Unsung Heroes of Your Network
To get a real feel for how a DNS and DHCP server works together, let's forget the tech-speak for a moment. Imagine your Wi-Fi network is a popular, bustling restaurant. This simple picture makes these complex ideas click into place.
Think of your DHCP server as the restaurant's maître d'. When a new guest—say, your smartphone or laptop—walks in, they don't just wander around looking for a spot. The maître d' greets them and assigns a unique table number. This is their IP address. It makes sure no two guests try to claim the same seat, preventing total chaos and keeping service running smoothly. This hands-off process is a lifesaver in busy BYOD Corporate sectors and Education campuses where hundreds of new devices connect every single day.
From Table Number to Placing an Order
Okay, so you're seated at your table with a unique number. Now what? You need a menu to order. That's exactly what the DNS server does.
The menu translates a dish name you can easily remember (like 'google.com') into a specific ticket the kitchen understands (the website's numerical IP address). You just tell the waiter the name of the dish, and they take care of the rest behind the scenes. Without that menu, you'd have to memorize the kitchen's complicated order codes for everything you want to eat—an impossible task. DNS saves us from that headache on the internet, turning easy-to-remember domain names into the IP addresses networks use to locate websites.
When you're dealing with DHCP, you might run into bumps along the road. It's useful to know how to fix IP configuration failure if things go wrong.
It boils down to this: DHCP gets your device on the network by handing it a unique address, and DNS lets you navigate that network by translating friendly names into technical addresses. You can't have a good online experience without both.
This seamless automation is the bedrock of modern networking. The Dynamic Host Configuration Protocol (DHCP) is the engine behind it all. In fact, the market for DHCP services is on track to more than double, from USD 2.5 billion to USD 5.6 billion by 2033. This massive growth is fueled by the explosion of IoT devices, which are expected to hit 75 billion globally by 2025. For a busy Retail environment, this automation is what prevents a constant storm of IP conflicts as thousands of shoppers log in daily. Discover more insights about the DHCP services market.
For networks running on Cisco and Meraki gear, this DHCP and DNS partnership is even more critical. It's the first step in a user's journey, whether that's landing on a Captive Portal for a quick social login or connecting through an advanced Authentication Solution like IPSK or EasyPSK. Without this solid foundation, the seamless guest wifi experiences we all expect today simply wouldn't work.
How Captive Portals Depend on DNS and DHCP
Ever wonder how that slick, branded login page pops up when you connect to a coffee shop's Wi-Fi? It’s not magic. It's actually a perfectly choreographed dance between your network's DNS and DHCP servers, working together behind the scenes. This process is the unsung hero of nearly every modern guest wifi experience.
First things first, a device needs a way to talk to the network. The moment a guest connects, the DHCP server jumps into action, assigning a unique IP address to their phone or laptop. Without that IP address, the device is effectively an outsider, unable to send or receive any information.
The DNS Detour That Makes It All Work
Once the device has its IP address, the real trickery begins. The user opens their browser and tries to visit a website—let's say google.com. This is where the DNS server takes center stage.
Instead of looking up Google's IP address, the DNS server intercepts that request. For any user who hasn't been authenticated yet, it has one job: send them straight to the captive portal's login page. This controlled "detour" is the core mechanism that makes wifi captive portal authentication solutions work, ensuring everyone sees your welcome screen before getting full internet access.
This simple, three-step flow is the foundation of the entire guest connection process.
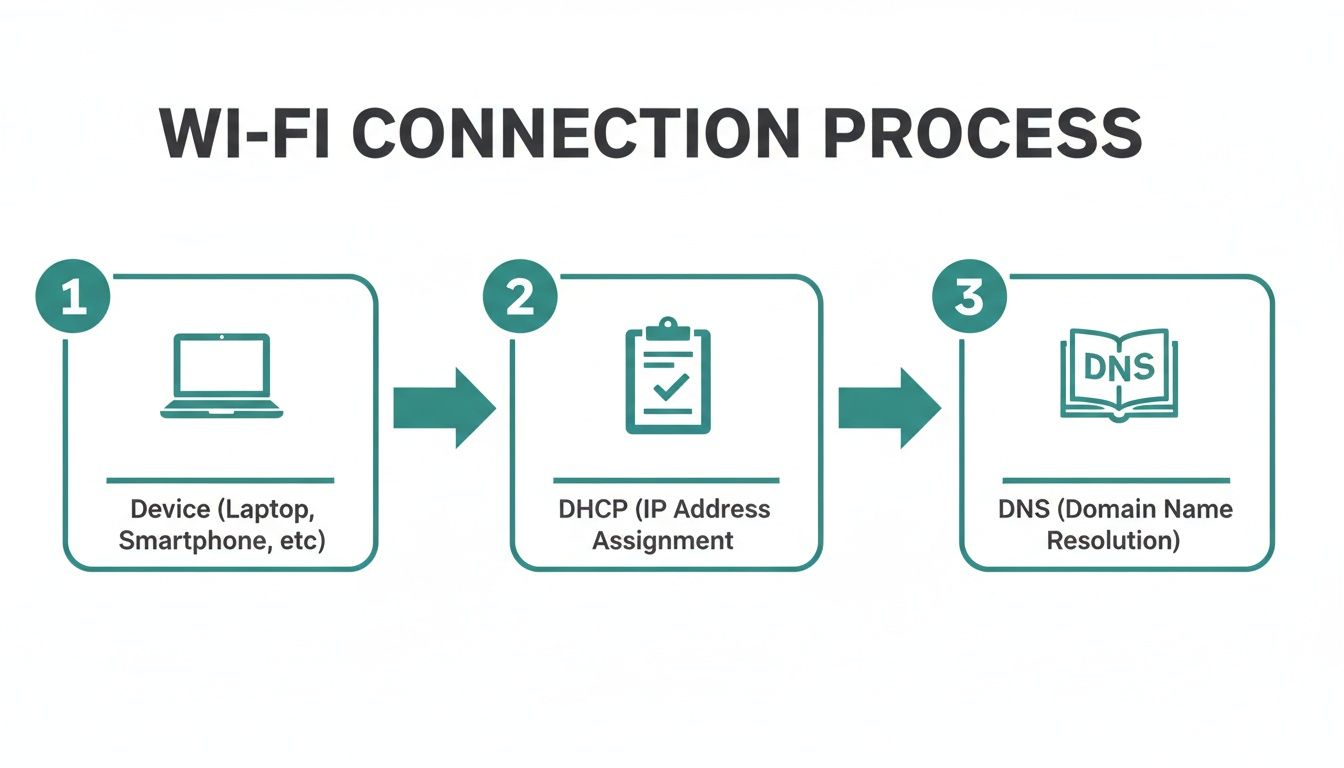
As you can see, the device gets its IP address from the DHCP server first, which then allows the DNS server to step in and manage where the user goes next.
Let's break down exactly how these two services work hand-in-hand during that initial connection.
DHCP and DNS Roles in the Captive Portal Journey
This table walks through the step-by-step interaction between the user, DHCP, and DNS when a captive portal is in place.
| Step | User Action | DHCP Server Role | DNS Server Role |
|---|---|---|---|
| 1 | Connects to the guest Wi-Fi network. | Receives the connection request. | Inactive. |
| 2 | Receives an IP address. | Assigns an available IP address, subnet mask, and gateway from its pool. | Inactive. |
| 3 | Opens a browser and tries to visit a website. | The IP address is now active and in use. | Receives the DNS query for the website. |
| 4 | Gets redirected to the login page. | No further action is needed at this stage. | Intercepts the query and responds with the IP address of the captive portal instead. |
| 5 | Authenticates on the portal (e.g., social login). | No further action is needed. | After successful authentication, it resolves all future DNS queries normally. |
It's a clever, sequential process. DHCP provides the connection, and DNS controls the experience until the user is fully authorized.
Powering Modern Guest Wi-Fi Experiences
This DNS interception is what turns a basic Wi-Fi network into a powerful marketing and security tool. It’s the engine that allows platforms running on Cisco Meraki hardware to present rich login experiences, from simple terms acceptance to engaging social wifi logins.
This functionality is absolutely critical in several key sectors:
- Education: Schools and universities use it to securely onboard students in dorms and manage network access across huge campuses.
- Retail: Shopping centers deploy it to capture valuable marketing data and push promotions right from the login screen.
- Corporate BYOD: Businesses rely on it to give visitors and employees' personal devices secure, isolated internet access without touching the internal corporate network.
The core takeaway is that a captive portal isn't just a webpage. It's an intelligent redirection system that completely depends on the correct configuration of your DNS and DHCP server. Nailing this setup is the first step to building a secure, reliable, and effective guest network.
This controlled environment, managed by your Meraki network, is what turns every single connection into a new opportunity.
Choosing Your DHCP Architecture with Cisco Meraki
When you're setting up a network with Cisco Meraki gear, one of the first forks in the road you'll hit is deciding where your DHCP server will live. This isn't just a technical detail; it shapes how simple, scalable, and controllable your network will be. You have two main paths, and the best one for you hinges entirely on your needs—whether you're running a small coffee shop or a massive university campus.
The first route is to use the built-in DHCP server that comes with the Meraki access points (APs). This is often called "NAT mode," and for smaller setups, it's a beautifully simple solution.
The Simplicity of Built-In DHCP
If you’re managing a single retail store, a small office, or a one-off event, letting the Meraki AP handle DHCP is a fantastic choice. It essentially creates a self-contained network in a box. The AP does it all: hands out IP addresses, manages traffic, and keeps things running smoothly.
The main draws here are pure simplicity and speed. There’s no need to configure and maintain a separate server, which saves you both time and money. Everything is handled right from the Meraki cloud dashboard, making it incredibly easy to spin up a guest wifi network for things like social login.
But that simplicity has its trade-offs. This approach just isn't built for big, complex networks. Each AP running in NAT mode is its own little island. That’s a problem for larger organizations that need a unified view and centralized control over their entire network. If you're weighing these options, you might want to learn more about the differences between cloud and server-based solutions.
The Power of an External DHCP Server
Now, for larger environments—think Education campuses, multi-location Retail chains, or sprawling BYOD Corporate sectors—a dedicated, external DNS and DHCP server is the only way to go. In this setup, the Meraki APs switch to "bridge mode." They stop being the boss and instead act like a bridge, simply passing all DHCP requests on to your central server.
This is where you'll hear the term DHCP relay (or IP Helper). The Meraki AP listens for a device asking for an IP address and forwards that request to a server you’ve designated, which could be anything from a Windows Server to a dedicated network appliance.
This centralized model gives you an incredible amount of power. You can manage one unified pool of IP addresses for the whole organization, apply consistent security policies everywhere, and easily plug into advanced authentication solutions like IPSK and EasyPSK.
Here’s a quick rundown of why a central server is the gold standard for any network at scale:
- Granular Control: You can create very specific DHCP options and manage all your IP address ranges from a single dashboard.
- Enhanced Security: It’s much easier to integrate with other security platforms and access control systems when everything funnels through one point.
- Scalability: A dedicated server is built to handle thousands of simultaneous IP address requests, far more than any single AP could ever manage.
- Simplified Troubleshooting: When every IP address is assigned from one place, tracking down and fixing network problems becomes a whole lot easier.
At the end of the day, your choice is a balance between convenience and control. Meraki's built-in DHCP is perfect for getting a simple network online fast. But for any organization that relies on a robust, secure, and scalable network, an external DNS and DHCP server provides the horsepower you truly need.
Securing BYOD with Advanced Authentication like IPSK
In busy places like university campuses or corporate offices where everyone brings their own devices, sharing a single Wi-Fi password is a massive security headache. Every time someone leaves the company, you have to change the password for the entire organization. It's disruptive, inefficient, and frankly, outdated. This is where modern authentication solutions like Individual Pre-Shared Keys (IPSK) and EasyPSK come into play.
Instead of one password for everyone, IPSK gives a unique, personal passphrase to each user or device. Think of it like giving every employee their own keycard to the office instead of a single master key that gets passed around. This simple change makes your network dramatically more secure and so much easier to manage.
How DNS and DHCP Support IPSK
Your DNS and DHCP server setup is the unsung hero that makes this advanced security work. When a user connects with their unique IPSK, the process kicks off just like any other Wi-Fi connection: the DHCP server hands their device an IP address. That’s step one to getting online.
Here’s where it gets smart. The IPSK authentication system has already confirmed that specific user and their unique key. This creates a direct link between the IP address assigned by DHCP and a known, trusted person. For network admins, this means you have a crystal-clear record of who is using which IP address at all times—a powerful tool for accountability.
The real power here is granular control. If a student moves out of a dorm or an employee loses their phone, an admin can instantly revoke that one specific key without disrupting anyone else on the network.
This setup brilliantly combines the automatic address management of DHCP with the strong, per-user security of IPSK. The result is a secure and scalable network solution that’s built for the way we work today.
Ideal Use Cases for IPSK
This authentication method shines in environments where people and devices come and go frequently, but security can't be an afterthought. Your existing DNS and DHCP server infrastructure, when paired with IPSK technology, provides a rock-solid framework for these scenarios.
- Corporate BYOD: Securely onboard employee-owned devices without granting them full access to the internal corporate network.
- Education Campuses: Easily manage network access for thousands of students across dorms, classrooms, and libraries using individual credentials.
- Long-Term Guest Access: Provide secure, long-term Wi-Fi for contractors or extended-stay visitors without the security risks of a shared password.
This technology is a cornerstone for modern Cisco Meraki networks, giving you a secure alternative to wide-open guest wifi or clunky captive portals for your trusted users. If you're ready to implement a system like this, you can learn more about using IPSK with RADIUS authentication to build an even more robust and secure network. It's all about moving past outdated security habits and adopting a more intelligent, user-focused way of managing network access.
Best Practices for a Secure and Scalable Network
As your guest Wi-Fi network grows, so do the demands on your DNS and DHCP server. Keeping everything secure and reliable, whether you're running a busy cafe or a massive university campus, really comes down to smart planning. Let's walk through some practical best practices to keep your network humming along.

Security has to be job number one. A poorly configured network is an open invitation for disruptions that will not only frustrate your users but also create some serious security headaches. A great place to start is by putting the built-in features in your Cisco Meraki environment to work.
Bolstering Your Network Defenses
One of the most powerful tools in your arsenal is DHCP snooping. Think of it like a bouncer at the door of your network. It meticulously checks all DHCP traffic to spot and block any unauthorized or "rogue" DHCP servers trying to crash the party. This simple check stops bad actors from handing out bad IP addresses and hijacking your users' traffic.
Another critical tactic is DNS filtering. This is your first line of defense against malicious websites, phishing attacks, and other unwanted content. It's an absolutely essential security layer for any BYOD Corporate sectors or Education campus where you have zero control over the devices people bring with them.
A secure network is a trustworthy network. By proactively blocking threats with tools like DHCP snooping and DNS filtering, you protect your users and ensure the integrity of your authentication solutions, from social login on a captive portal to IPSK onboarding.
Designing for Growth and Reliability
Scalability isn't just about handling more devices; it's about doing it without breaking a sweat. One of the easiest and most impactful adjustments you can make is fine-tuning your DHCP lease times.
- High-Turnover Locations (Retail): In a shopping mall where people are coming and going, a short lease time—say, one hour—is perfect. It frees up IP addresses quickly, making sure there's always one ready for the next customer.
- Stable Environments (Corporate): For an office where employees stay connected all day, a much longer lease time, like 24 hours, makes more sense. It cuts down on needless network traffic and gives everyone a more stable connection.
Finally, always have a backup plan. Putting all your eggs in one DNS and DHCP server basket is just asking for an outage. By setting up a secondary failover server, you ensure that if your primary server goes offline, the backup can take over instantly. This one step is crucial for keeping your guest Wi-Fi online and your business running.
For more deep-dive tips, check out our guide on the best practices for network security.
Frequently Asked Questions About DNS and DHCP
Let's dig into some of the most common questions we hear about setting up DNS and DHCP, especially for networks running guest wifi on Cisco Meraki gear.
Can One Server Handle Both DNS and DHCP?
Absolutely. In fact, for most small to medium-sized networks, having a single server manage both roles is the way to go. It keeps things simple and efficient, especially when the services are running on a router or firewall.
However, once you scale up to larger environments like those in Education or big Corporate sectors, splitting DNS and DHCP onto dedicated servers is a smart move. It boosts performance, adds resilience, and makes troubleshooting much easier.
Why Is My Device Stuck on the Captive Portal?
This is a classic problem, and 9 times out of 10, it's a DNS issue. When a user authenticates through your captive portal, maybe using a social login, the network needs to do two things: grant them access and stop redirecting their traffic.
If the DNS handoff fails after they've logged in, the network keeps hijacking their requests instead of resolving actual website names. The result? The user is stuck in a loop on the portal page, unable to get to the real internet. This really underscores how tightly your authentication solutions and DNS settings are connected.
Does IPSK Need a Special DHCP Setup?
Nope, you're in the clear here. Advanced authentication solutions like IPSK and EasyPSK are designed to work perfectly with any standard DHCP server.
The DHCP server’s role doesn't change—it just hands out an IP address like it always does. All the clever stuff happens at the authentication layer, where the network links that IP address to the user's unique key. This is great because it means you can secure all those BYOD devices without having to overhaul your core IP address management.
If you're running into other issues, it might be helpful to understand what happens when your DHCP server is not responding.
Ready to create a seamless and secure guest Wi-Fi experience? Splash Access integrates perfectly with your Cisco Meraki hardware, transforming your network into a powerful tool for engagement and data collection. Visit https://www.splashaccess.com to see how we can help.


