Ever wondered how a single network cable can handle traffic from multiple, separate networks all at once? That's the magic of VLAN trunking. Think of it as the technology that lets one wire do the job of many, carrying completely separate streams of data at the same time without them ever mixing.
It’s an incredibly smart and efficient way to build a modern network, and it's the secret sauce behind a lot of the tech we use every day.
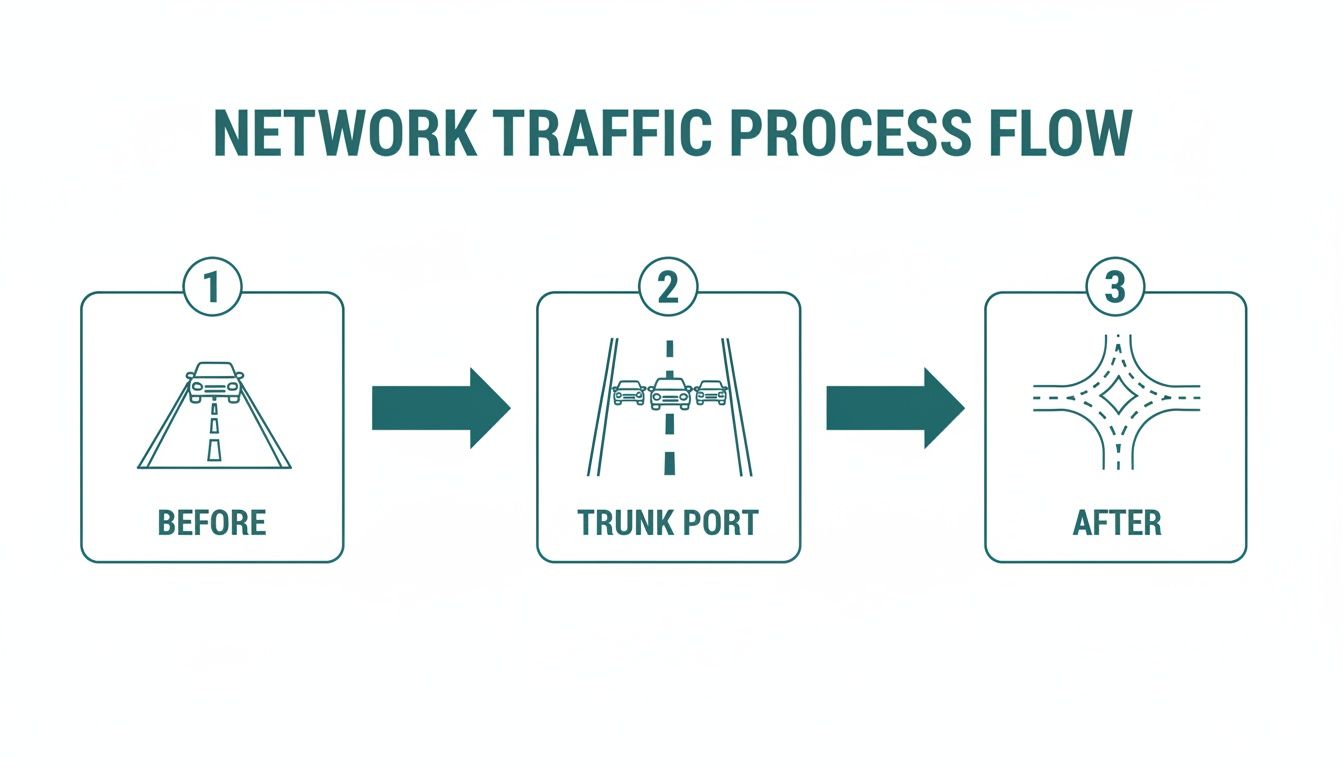
A Superhighway for Your Network Data
Let's get friendly with an analogy. Picture your network as a busy city. Without VLANs, all your data—from employee laptops, guest smartphones on your Wi-Fi, and security cameras—is crammed onto the same street. It’s a traffic jam waiting to happen, not to mention a security nightmare. A standard network port, called an "access" port, is like a one-way street that only lets a single type of traffic through, say, just your employee data.
VLAN trunking completely changes the game. It turns that single-lane street into a multi-lane superhighway. Each lane is a dedicated Virtual LAN (VLAN), reserved for a specific kind of traffic.
- Lane 1: Corporate data for staff in a BYOD environment (VLAN 10)
- Lane 2: Guest Wi-Fi traffic for customers in a Retail store (VLAN 20)
- Lane 3: Student devices in an Education setting (VLAN 30)
This setup is the backbone of almost every modern network, especially for Wi-Fi. It solves a massive problem for businesses by getting rid of the need to run a separate physical cable for every single network.
Why Does This Matter for Wi-Fi?
In the real world, VLAN trunking is what allows a single Wi-Fi access point from a company like Cisco or Meraki to broadcast multiple Wi-Fi networks (SSIDs). This means you can have a secure guest wifi network with its own Captive Portal and cool features like social login, running right alongside your private internal network, but completely walled off from it.
By consolidating traffic, VLAN trunking becomes the foundation for secure, efficient, and scalable Wi-Fi services, especially for guest access and BYOD policies.
This is also essential for BYOD (Bring Your Own Device) environments where you need smart Authentication Solutions like IPSK or EasyPSK to automatically sort devices into the correct VLAN the moment they connect. It's all about making sure the right people get on the right network lane, effortlessly.
Of course, all this traffic management doesn't happen by magic—it's handled by some pretty smart network hardware. To get a better handle on how it all works, it's worth understanding what are managed switches and the critical role they play in directing all this data across the virtual lanes.
How VLAN Trunking Works Behind the Scenes
So, how does a single cable juggle traffic from several different networks without everything turning into a jumbled mess? The secret sauce is a protocol called IEEE 802.1Q. The easiest way to picture it is to think of it like adding luggage tags to your data.
When a data packet from, say, your corporate network arrives at a trunk port, the switch sticks a special digital "tag" on it. This tag contains a VLAN ID, which is just a number that tells the network which virtual lane that packet belongs to. As the packet travels, every switch reads the tag to keep it in the right lane, making sure it only goes where it's supposed to.
As you can see, the trunk port essentially acts like an on-ramp for a multi-lane highway, neatly organizing traffic from different sources onto a single, high-capacity link. This is a foundational concept in modern networking and a core component of network virtualization.
This technology has been around since the mid-1990s. Back then, large networks for universities (Education) and Retail chains were quickly outgrowing their simple, flat designs. Instead of running a new physical cable for every single department or service—which was becoming a nightmare to manage—they started using 802.1Q trunks to segment traffic logically.
The Special Case of the Native VLAN
Okay, but what happens to traffic that shows up at a trunk port without one of those 802.1Q tags? That’s where the Native VLAN comes in.
Think of the native VLAN as the default, unmarked lane on our data highway. Any untagged data that hits a trunk port gets automatically steered into this specific VLAN.
On most switches, including those from Cisco and Meraki, the native VLAN is VLAN 1 right out of the box. This is convenient for initial setup, but leaving it as the default is a major security no-no. It can create an open door for unauthorized devices to hop onto your network if things aren't configured perfectly.
A critical best practice is to change the native VLAN to an unused, isolated VLAN ID. You should also make it a rule to never, ever use VLAN 1 for any of your actual network traffic.
This one tweak goes a long way in hardening your network. For instance, when setting up a guest wifi network that uses a Captive Portal, you need to be absolutely sure that guest traffic is always tagged and isolated. The last thing you want is for it to spill over onto the native VLAN, bypassing your security measures.
Getting Your Hands Dirty: Configuring VLAN Trunks on Cisco and Meraki
Theory is great, but the real learning happens when you start plugging things in. Let's walk through how to actually set up a trunk port in two of the most common networking environments out there: the classic command line and a modern cloud dashboard.
This way, you'll be covered whether you're managing a traditional Corporate network or setting up Wi-Fi for a coffee shop.
The Classic: Cisco IOS Command Line
For network engineers who cut their teeth on the command-line interface (CLI), configuring a trunk on a Cisco switch is like muscle memory. It’s powerful, it's precise, and it gives you complete control over exactly how that port behaves.
Here’s a quick look at the essential commands you'd use to turn a standard switch port into a trunk:
- Jump into the Interface: First, you have to tell the switch which physical port you want to configure.
interface GigabitEthernet1/0/1 - Make it a Trunk: This is the key command that flips the port's personality from a standard access port to a trunk.
switchport mode trunk - Set the Tagging Protocol: You need to explicitly tell the switch to use the 802.1Q standard for its VLAN tags.
switchport trunk encapsulation dot1q - Specify Allowed VLANs: For security, you should always define exactly which VLANs are allowed to travel across this link. This is a crucial step to prevent unwanted traffic from "leaking" where it shouldn't.
switchport trunk allowed vlan 10,20,30
This CLI method is really the foundation of network configuration and a must-know for anyone managing enterprise-grade gear. For a more detailed guide on the entire process, check out our article on setting up a VLAN.
The Modern Way: Cisco Meraki Dashboard
What if you prefer a more visual, cloud-based approach? That's where the Cisco Meraki dashboard shines. It’s a favorite in places like schools (Education), Retail stores, and offices with BYOD policies because it makes deployment and management incredibly straightforward.
Instead of typing commands, you just point and click.
Configuring a switch port as a trunk is as simple as this:
- Navigate to the switch and click on the port you want to edit.
- Change the port Type from "Access" to "Trunk."
- In the Allowed VLANs field, type the VLAN IDs you want to permit, like "10,20,30."
This screenshot shows just how clean the Meraki interface is for managing your network devices.
This visual layout lets you see your entire network’s status at a glance. It makes it dead simple to deploy services like Captive Portals or even advanced Authentication Solutions like IPSK and EasyPSK without needing deep CLI expertise.
At the end of the day, it doesn't matter if you're using the precision of the Cisco CLI or the simplicity of the Meraki dashboard. The goal is the same: to build a secure, multi-lane highway for your network data, making sure your corporate, guest Wi-Fi, and IoT traffic all stay safely in their designated lanes.
Powering Secure Guest Wi-Fi with VLANs
So, what does all this VLAN trunking theory look like in the real world? This is where the rubber meets the road. It's the technology that makes modern, secure guest wifi possible, letting a single access point broadcast multiple, completely separate networks.

Think about all the different places that need this. A school campus (Education), for instance, can have one SSID for students, another for faculty, and a third for visitors—all running on the same hardware but totally isolated from each other. In a Retail shop, you can offer free guest Wi-Fi using social login or social wifi while keeping the sensitive payment systems firewalled off on their own private VLAN.
Granular Control for Every Connection
This kind of segmentation is absolutely critical in corporate "bring your own device" (BYOD) environments. It's where you start seeing advanced Authentication Solutions like Individual Pre-Shared Keys (IPSK, sometimes called EasyPSK) come into the picture. With a trunk port configured, your network can automatically assign a specific user or device group to its designated VLAN the moment it connects.
This is also how you can deploy secure Captive Portals effectively. It ensures guest devices are shuttled over to a specific VLAN for authentication, while employees connect seamlessly to the internal corporate VLAN without seeing a login page.
VLANs provide the digital walls needed to separate different types of traffic. Trunking provides the highway that allows all of this segmented traffic to travel efficiently over a single physical infrastructure, from the Wi-Fi access point to the core network switch.
This capability is a game-changer in dense environments. For a guest Wi-Fi deployment in a multi-tenant building, a single trunk from each access switch can carry 5–20 VLANs (guest, staff, IoT, CCTV, VoIP, payment terminals) up to a Meraki core switch. The alternative? Running separate physical cables for every single service. This approach drastically cuts down on hardware costs while allowing for incredibly precise policy control.
The Foundation of Modern Wi-Fi Security
At the end of the day, VLAN trunking underpins the security and functionality of just about every modern wireless network. From a small coffee shop to a sprawling university campus, it's the technology that lets you offer different services to different people, all on the same network, without everything turning into a security nightmare.
It gives network administrators the power to:
- Isolate Guest Traffic: Keep the public-facing Wi-Fi completely walled off from the internal network, protecting sensitive company data.
- Enforce Access Policies: Apply different rules, bandwidth limits, and web filters to different groups of users based on the VLAN they're on.
- Support Multiple SSIDs: A single Cisco or Meraki access point can broadcast several distinct networks (like "Corporate," "Guest," and "IoT") all at the same time.
This segmentation is the first and most vital step in building a secure, manageable wireless network. If you're ready to see how these principles are put into practice, our guide on how to set up guest Wi-Fi is a great next step.
VLAN Security Best Practices and Troubleshooting
A well-designed network is a secure one, and that's a friendly fact! When it comes to VLAN trunking, a few key practices can make all the difference. Simple mistakes don't just cause network outages; they can swing the door wide open for security risks like VLAN hopping. This is an attack where someone tricks a switch into giving them access to a VLAN they have no business being on.
For a great overview of the fundamental principles of network and information security that these practices are built on, that link is a solid resource for a broader context.
The first step to locking things down is just good housekeeping. Any switch port you aren't actively using should be disabled. Period. Then, assign it to a completely isolated, unused VLAN. This one simple action prevents an unauthorized person from just plugging in a device and getting a free pass onto your network.

From there, you can move on to more specific security measures. These are absolutely critical for any network, but especially those in Education, Retail, or corporate BYOD environments where you have a mix of trusted and untrusted devices.
Hardening Your Trunk Ports
When it comes to securing a trunk link, there are two golden rules: deal with the Native VLAN and be strict about what traffic you allow. These aren't just suggestions; they're non-negotiable for a secure setup.
- Change the Default Native VLAN: Nearly every Cisco and Meraki switch out of the box uses VLAN 1 as the native VLAN. Attackers know this, making it an easy target. Always change the native VLAN to an unused ID and, crucially, make sure no actual devices ever use it for data traffic.
- Explicitly Allow VLANs: Don't ever leave a trunk port wide open to carry every possible VLAN. Instead, you need to create an "allow list" that specifically tells the port which VLANs are permitted to cross. This is how you guarantee that only authorized traffic can pass between switches.
The goal is to be intentional. By actively defining what is and isn't allowed, you dramatically reduce your network's attack surface. This prevents accidental data leaks between segments, like keeping your guest wifi completely separate from your internal corporate network.
Quick Troubleshooting for Common Issues
Even with a perfect plan, things can go wrong. When connectivity problems pop up with VLAN trunking, they often come down to a handful of common mistakes. If users on your social wifi Captive Portal suddenly can't get an IP address, or an entire department loses connection, there’s a good chance it’s a VLAN mismatch.
A native VLAN mismatch is a classic culprit—this happens when the native VLAN is configured differently on each end of the trunk link. Similarly, if the "allowed VLANs" list isn't identical on both switches, traffic for the misconfigured VLAN will simply be dropped.
These problems can be frustrating to track down, but our guide to https://www.splashaccess.com/vlan-troubleshooting-with-ms/ can help you pinpoint and fix them fast.
Where Network Segmentation is Headed
VLAN trunking has been a workhorse of network segmentation for decades, and it's not going anywhere. But as networks get more complex and spread out, especially across different physical sites, new technologies are cropping up to handle the sheer scale.
Think of these new methods as building on the same core idea of traffic isolation that VLANs provide. It’s like taking that multi-lane VLAN highway we talked about and expanding it into a massive, interconnected system that can stretch across a city or plug directly into the cloud. This is where overlay technologies like VXLAN (Virtual Extensible LAN) are starting to shine.
Breaking Past the 4,094 VLAN Ceiling
The biggest limitation of traditional 802.1Q VLANs is the hard cap of 4,094 IDs. That sounds like a lot, but for huge data centers, multi-tenant buildings, or sprawling campus networks, it's surprisingly easy to hit that limit.
VXLAN smashes through that ceiling by supporting over 16.7 million virtual networks. This is a massive leap, making it perfect for large-scale environments that need to isolate thousands of different SSIDs, IoT device groups, or individual customer networks. To get a feel for how this technology is being adopted, you can learn more about the growing market for VXLAN and its applications.
It’s important to see VXLAN not as a replacement for VLAN trunking, but as a powerful evolution. The core concept of separating traffic remains the same; the scale is just massively expanded.
For large, distributed organizations—think university campuses (Education), big Retail chains, or corporations with extensive BYOD policies—this kind of scale is a game-changer. It enables network admins to apply consistent security rules and segmentation across every location, whether they're running on Cisco or Meraki hardware.
Imagine a retail brand rolling out the exact same secure guest Wi-Fi policy at every one of its stores nationwide. We're talking the same social logins, Captive Portals, and Authentication solutions like IPSK at every location, managed centrally. This level of consistency and security all comes back to the fundamental idea of isolating traffic—a principle pioneered by VLAN trunking that remains absolutely essential today.
Common Questions About VLAN Trunking
Here are a few of the most common questions people ask when they're first getting started with VLAN trunking. Let's tackle them in a friendly, conversational way.
How Many VLANs Can a Single Trunk Port Carry?
Technically speaking, a standard 802.1Q trunk port can handle traffic for up to 4,094 different VLANs. But that's just the theoretical limit of the protocol.
In the real world, the hardware capabilities of your Cisco or Meraki switches and the overall network load mean you’ll use a much smaller number on any single link to keep things running smoothly.
Can a Trunk Port Connect Directly to a Computer?
Nope, and it's a good thing! A trunk port is designed to talk to other smart devices that understand VLAN tags—like other switches, routers, or Wi-Fi access points.
Your everyday devices like a computer or a printer need to connect to an access port. An access port is much simpler; it just belongs to one specific VLAN and doesn't have to worry about all that tagging business.
What Happens if Native VLANs Do Not Match?
Oh, this is a classic headache! A native VLAN mismatch is one of the most frequent (and frustrating) configuration errors you'll run into. It's a recipe for unpredictable connection problems and can open up some serious security holes.
When the native VLANs don't match on both ends of a trunk link, traffic can essentially "leak" from one VLAN into another.
This is especially dangerous in places like Education or Retail stores. A mismatch could accidentally allow traffic from an open guest wifi network to bleed into a secure internal network. It's absolutely critical to ensure they are set up identically on both sides of the trunk.
Why is VLAN Trunking Important for Guest Wi-Fi?
VLAN trunking is the secret ingredient that lets a single Wi-Fi access point broadcast multiple networks (SSIDs) at the same time.
For instance, you can offer a social wifi network for customers, complete with a Captive Portal, that's completely walled off on its own VLAN. At the same time, your staff can connect to a separate, secure corporate SSID—all from the same physical access point. This is also a cornerstone of corporate BYOD policies that use Authentication Solutions like IPSK or EasyPSK to automatically assign employee devices to the right secure network segment.
Ready to create a secure, seamless Wi-Fi experience for your guests? Splash Access integrates with your Cisco Meraki gear to provide powerful captive portals, social logins, and advanced authentication solutions. Learn more about our Guest Wi-Fi solutions.


