Hey there! When it comes to assigning an IP address, you've got two main choices: you can let your network hand one out automatically (that's dynamic) or you can set it up yourself (that's static). Honestly, the best way to go depends on what you're trying to do. Automatic assignment is a lifesaver for guest WiFi and personal devices, while a manual setup is absolutely essential for your critical network gear.
Why Getting IP Addresses Right Matters
Think of an IP address as a unique street address for every single device trying to get online. It doesn't matter if it's a student's laptop in a university library, a cash register in a busy retail store, or an employee's phone in a BYOD corporate office—each one needs its own identifier to chat with the network. Without this system, data packets would get lost, and your digital traffic would grind to a halt.
There are two main ways to hand out these addresses, and picking the right one is the first step toward a rock-solid and secure WiFi network. This choice impacts everything from how smoothly people connect to how well your network is protected, especially when you're using awesome platforms like Cisco or Meraki.
Dynamic vs. Static IP Assignment
The most common approach you'll see is Dynamic IP assignment, which is handled by a friendly helper called a DHCP (Dynamic Host Configuration Protocol) server. This is pretty much the "set it and forget it" method. When a device joins the network, it asks for an IP address, and the DHCP server leases one from a big pool of available addresses.
This works beautifully in places where devices are constantly coming and going, such as:
- Guest WiFi networks in cafes or retail stores.
- Student devices popping on and off the network in a school library or dorm in the education sector.
- Corporate offices that have embrace BYOD corporate policies.
On the flip side, Static IP assignment is a deliberate, hands-on process. You, the network guru, assign a permanent IP address to a specific device. This is reserved for the VIPs of your network—the hardware that absolutely needs to be found at the same address every single time. We're talking about printers, servers, and other core network equipment.
For a deeper look at how the big cloud providers handle networking and IP resources on a massive scale, this detailed AWS vs Azure vs GCP comparison is a great resource.
This simple infographic breaks down the two main paths a device can take to get an IP address.
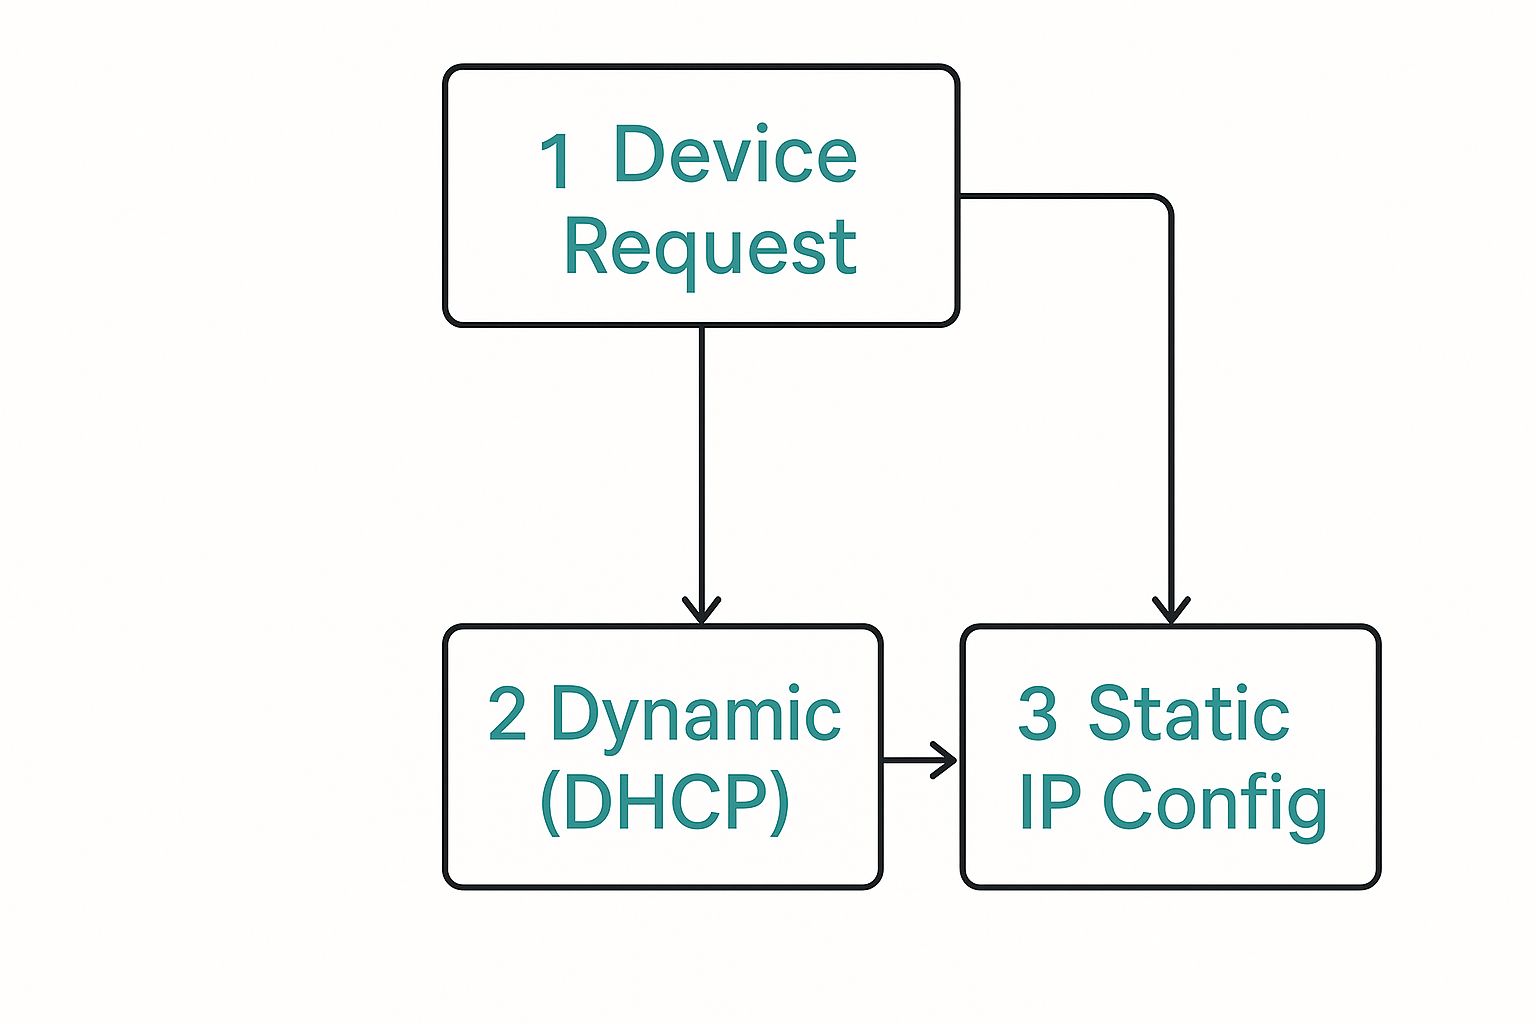
As you can see, every device starts by requesting an address. That request is then fulfilled either automatically through DHCP or through a purposeful manual configuration.
Dynamic vs Static IP Assignment at a Glance
To make the choice clearer, here’s a quick comparison to help you decide which method fits different scenarios in your network.
| Feature | Dynamic IP (DHCP) | Static IP |
|---|---|---|
| Assignment | Automatic, leased from a pool of available addresses. | Manual, assigned permanently to a specific device. |
| Best For | Laptops, smartphones, guest devices, IoT sensors. | Servers, printers, routers, and other critical infrastructure. |
| Management | Super easy. Minimal administrative overhead; "plug and play." | Requires careful tracking to avoid conflicts. |
| Reliability | Highly reliable for clients, but addresses can change. | Extremely reliable for services; the address never changes. |
| Cost | Lower administrative cost and simpler to manage at scale. | Higher administrative cost due to manual configuration. |
| Security | Less predictable, which can be a minor security benefit. | Easier to implement access control and monitoring. |
Ultimately, most healthy networks use a hybrid approach, leveraging the strengths of both methods to create a stable and efficient environment for all connected devices.
Key Takeaway: Nailing your IP assignment strategy is the first step toward unlocking cool advanced features. A well-planned network can support sophisticated Authentication Solutions like IPSK or EasyPSK and seamless Captive Portals, which are essential for managing guest and user access securely. This is especially true when you're working with powerful platforms like Cisco Meraki.
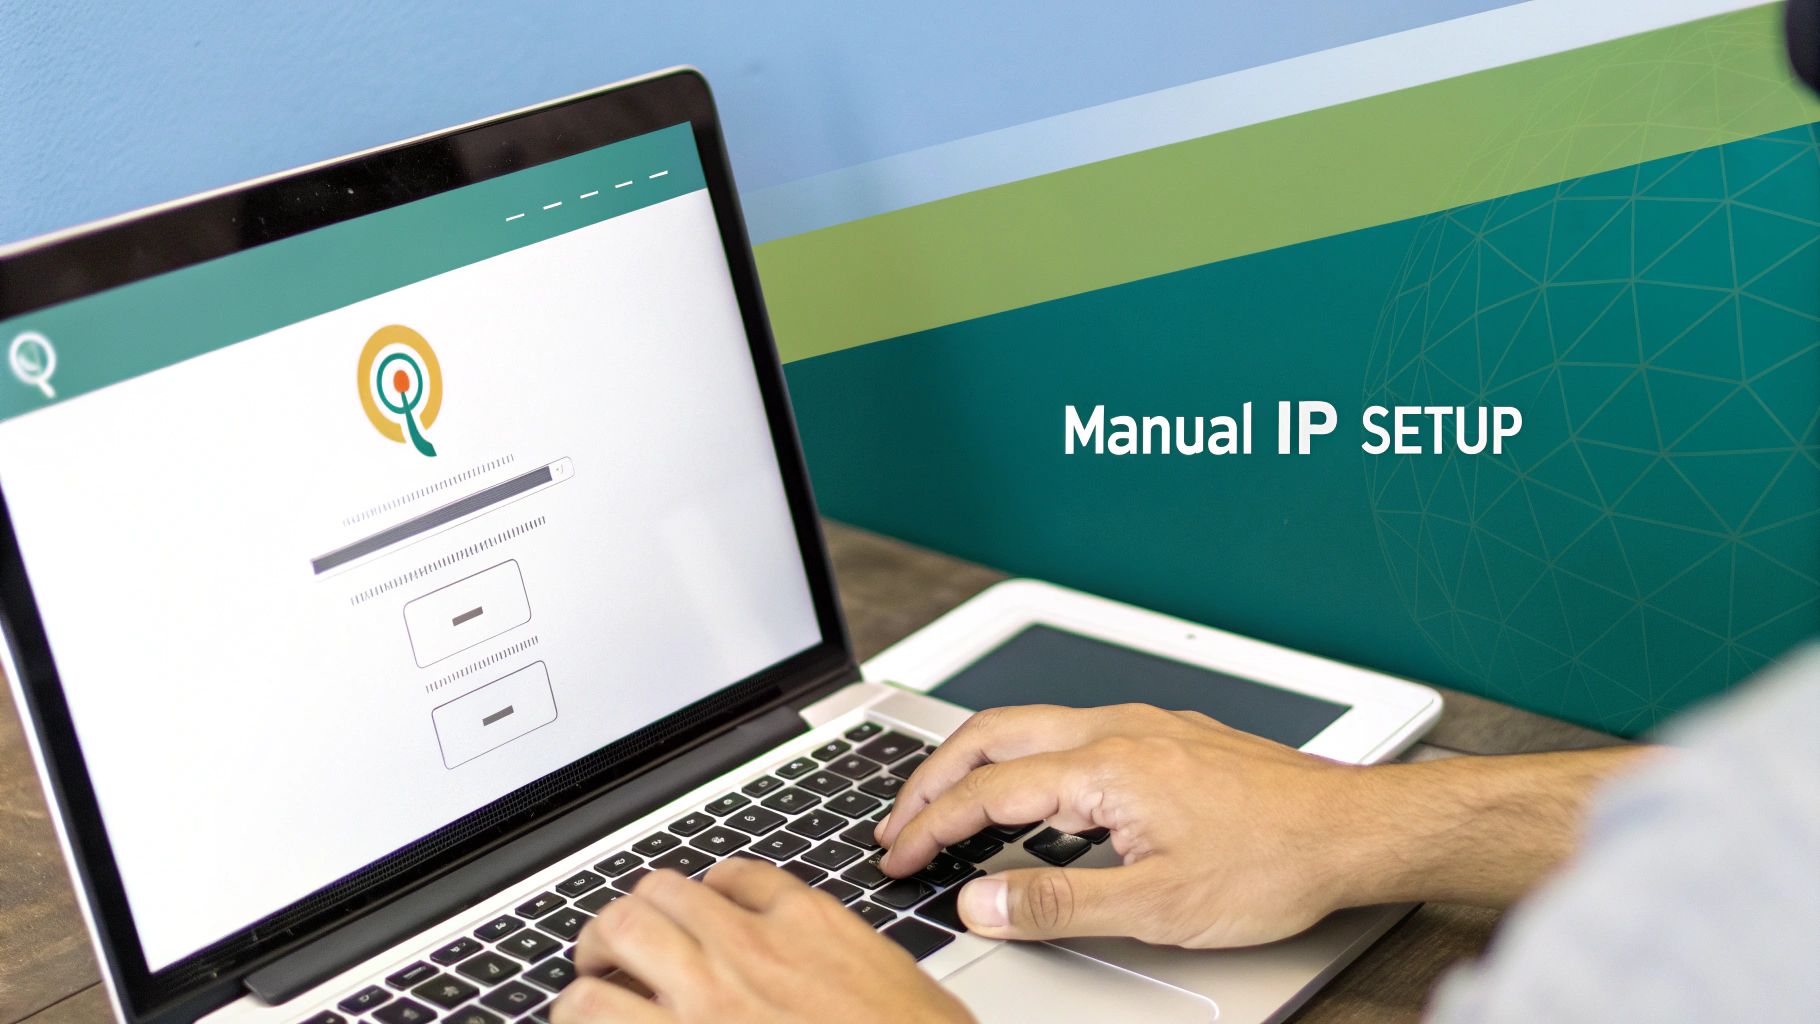
How to Manually Assign an IP Address on Any Device
Sometimes, you just need a device to stay put on your network. That's where manually assigning an IP address comes in handy. Think of setting up a dedicated server in a corporate office or configuring a specific piece of lab equipment for a school—you need that device to be reachable at the same address, every single time. While it might sound a bit technical, it's actually a pretty straightforward process on most operating systems.
Getting this manual setup right is the foundation for more advanced networking. For example, if you're rolling out a Captive Portal for your guest WiFi, the last thing you want is for your access points to change addresses. Pinning them down with static IPs is a simple step that ensures reliability, especially when you're managing complex Authentication Solutions in a busy venue like a retail store or university.
Finding Your Way to Network Settings
The biggest challenge is often just finding where the network settings are hiding. Every operating system has its own little spot for these controls, but the information you need to plug in is always the same.
Before you start clicking around, make sure you have these three details ready:
- IP Address: The new, unique address you plan to assign to the device.
- Subnet Mask: This tells your device how big the local network is. It’s almost always the same for every device on that network.
- Default Gateway: This is simply the IP address of your router—the gatekeeper to the wider internet.
Got them? Great. Now you can dive in. On a Windows machine, you'll be looking for the "Network & Internet" section in the Settings app. For macOS, head over to "Network" within System Settings. If you're on Linux, your network manager will have these options, though the exact location can vary a bit depending on your desktop environment.
A perfect real-world example we see all the time in the education sector is with network printers or classroom projectors. By giving them static IPs, student and faculty devices can always find them without a hitch. It completely avoids the connection headaches that pop up when an address changes unexpectedly.
Applying the New Static IP
Once you've navigated to the right screen, you’ll see an option to switch from automatic (often labeled DHCP) to manual IP configuration. This is your cue to carefully enter the IP address, subnet mask, and default gateway you gathered earlier. It's also a smart move to manually enter the DNS server addresses. You can get these from your network admin or just use a reliable public one.
Here’s a word of advice from experience: always double-check that the IP address you're about to assign isn't already being used by another device. An IP conflict is a surefire way to knock both devices offline and cause some seriously frustrating connectivity issues. This is especially critical in large BYOD corporate sectors where you might have hundreds of devices vying for network access.
For any organization managing a more complex network with hardware from vendors like Cisco, this level of manual control is absolutely essential for stability. Mastering IP management is also a critical skill if you're looking to implement stronger WiFi security like IPSK or EasyPSK. And if you’re just getting started, learning how to install a new router is the perfect first step to grasping these core networking concepts.
Streamlining IP Management with Cisco Meraki
Setting up IP addresses manually on every single device is manageable when you're dealing with a small home office. But scale that up to a busy retail center, a sprawling school campus in the education sector, or a corporate office with tons of personal devices connecting? It quickly becomes an administrative nightmare.
This is exactly where a cloud-managed platform like Cisco Meraki completely changes the game.

What makes Meraki so powerful is its web-based dashboard. It gives you a single, clear view of your entire network ecosystem. From that one screen, you can manage IP assignments for every WiFi access point, switch, and security appliance you own. It takes a frustratingly complex task and turns it into a few simple clicks.
Centralized Control from the Meraki Dashboard
Your first stop inside the Meraki dashboard is usually setting up the DHCP scopes. This is where you define the pool of available IP addresses that the system can automatically hand out to devices as they connect. You can easily create different scopes for different segments of your network, which is fantastic for both organization and security.
For those critical pieces of hardware—think servers, printers, or your main access points—you’ll want to create DHCP reservations. This is a neat trick that tells the Meraki system to always assign the same IP address to a specific device.
You get the ease of DHCP automation with the consistency of a static IP. It's the best of both worlds and a must-have in environments like education, where everyone needs reliable access to shared resources like network printers or media servers.
Getting comfortable with assigning IP addresses in the Meraki ecosystem is the key to unlocking its best features. A solid IP strategy is the foundation for effective Captive Portals and advanced Authentication Solutions—both of which are vital for securely managing how guests and users access your network.
Segmenting Your Network with VLANs
One of the biggest wins with a platform like Meraki is how simple it makes implementing Virtual LANs, or VLANs. Just think of a VLAN as a way to carve out separate, isolated networks that all run on the same physical hardware. It’s a massive step up for both security and traffic management.
For instance, you can easily set up dedicated VLANs for different groups:
- Guest Network: Keep visitor traffic totally separate from your internal network, protecting sensitive company data.
- Corporate Network: A secure zone for employees to access internal files and applications.
- Student Network: Provide filtered internet access for students while keeping them off the faculty and administrative network in an education setting.
- Point-of-Sale (POS) Network: For any retail business, isolating POS terminals on their own VLAN is a non-negotiable security practice.
When a user connects, Meraki can automatically shunt them into the correct VLAN and give them an IP address from the right pool, often based on their login credentials. This kind of automated segmentation makes managing a complicated BYOD corporate environment so much more secure and straightforward. To see how all these pieces fit together, it's worth taking a deeper look into https://www.splashaccess.com/what-is-cisco-meraki/.
Building a Secure IP Strategy for BYOD Environments
Bring Your Own Device (BYOD) isn't just a buzzword anymore—it's standard practice in offices (BYOD corporate), schools (education), and even retail shops. While letting people use their own devices offers a ton of flexibility, it also throws a wrench into network security. How do you manage all these personal phones, tablets, and laptops without leaving your network vulnerable?
It all comes down to a smart IP strategy that works with BYOD instead of fighting it.

This is where modern Authentication Solutions really shine. Forget relying on a single, shared password for everyone. A smarter approach integrates your IP assignment plan with more advanced security, ensuring that when a device connects, it’s not just grabbing an IP address. It's being properly identified and funneled to the right part of your network.
From Passwords to Identity with IPSK
Let’s talk about a game-changer: IPSK (Identity Pre-Shared Key), and its sibling, EasyPSK. These technologies completely move past the outdated "one password for everyone" model. Instead of handing out the same WiFi password to the entire organization, you can give a unique credential to every single user or device.
This is a massive win in a few key areas:
- Education: Every student can get a unique key tied to their student ID. If a laptop gets lost or a student leaves, you just revoke that one key. No one else is affected.
- Corporate: Onboarding and offboarding staff becomes a breeze. You can grant and revoke network access for contractors or temporary employees without ever sharing the main company password.
- Retail: You can securely connect point-of-sale systems or inventory scanners while keeping them completely separate from the public guest WiFi.
When a user connects with their unique key, a smart network—especially one built on a platform like Cisco Meraki—knows exactly who they are. This identity-first approach is a cornerstone of building a secure, modern network. To get this right, you need a clear policy from the get-go. A great place to start is by building a solid Bring Your Own Devices policy.
The Power of an Intelligent Captive Portal
A Captive Portal can be so much more than just a login page. When you tie it into your network infrastructure correctly, it becomes an automation powerhouse for IP assignments. Based on who logs in, the portal can make smart decisions in real-time.
Pro Tip: Think of your Captive Portal as a digital traffic cop. When a user authenticates, the portal can automatically steer their device to the right VLAN and assign an IP from the correct pool. A guest gets a guest IP, an employee gets a corporate IP, and a student gets a student IP—all without you lifting a finger.
This idea of making IP assignments more efficient has deep roots. It goes back to the mid-1980s with the introduction of subnetting, which let network admins carve up big networks into smaller, more secure chunks. Techniques like Variable Length Subnet Masks (VLSM) and the private address ranges defined in RFC 1918 gave us the granular control we needed. This foundational work is what allows the sophisticated, automated systems we use today to securely manage complex BYOD environments.
Looking Ahead with IPv6
If you've been in the networking world for a while, you've heard the talk about running out of IP addresses. It’s not just tech doomsday prepping; it’s a real challenge that has been decades in the making. The whole story revolves around IPv4, the system that got the internet off the ground, and why we've outgrown it.
IPv4 gave us a pool of about 4.3 billion unique addresses. That sounded like an astronomical number back in the day, but with the explosion of internet-connected devices, that well started running dry much faster than anyone anticipated.
This wasn't a surprise, though. Engineers saw this coming. Predictions about IPv4 address exhaustion from as far back as 1995 were remarkably on point, and by 2011, the main global supply of unallocated IPv4 addresses was gone. This scarcity was the final push needed to get the industry serious about adopting IPv6, a new standard with an address space so vast it's practically limitless. If you want the full history, it's worth reading up on the timeline of IPv4 exhaustion and its ripple effects.
What This Means for Your Network
So, why should this history lesson matter to you today, especially if you're managing a network in an education, retail, or BYOD corporate environment? Simply put, you have to think about the future.
While IPv4 isn't going away tomorrow, the internet is steadily moving toward IPv6. Building a network that can't speak the language of the future is a recipe for headaches down the road.
This is where modern networking platforms really shine. A system like Cisco Meraki, for instance, is built to be "dual-stack" right out of the box. This just means it can manage IPv4 and IPv6 traffic at the same time. You get the best of both worlds—supporting all your current devices while being completely ready for what's next.
This isn't just about abstract future-proofing. Think about it in practical terms. When you're setting up critical network services like IPSK for device authentication or a Captive Portal for guest access, you need to know your infrastructure can handle both protocols. Making that choice now means you won't be forced into a costly and disruptive overhaul a few years from now.
Your First Steps with IPv6
You don't have to become an IPv6 expert overnight. The key is to just start.
A great first move is to simply enable IPv6 on your Cisco or Meraki gear if you haven't already. Spend a little time getting familiar with how IPv6 addresses are structured—they look different, but the core concepts are the same.
Taking these small steps ensures your network can communicate with the growing number of IPv6-only services and devices out there. It’s a simple action that keeps your users connected and your network relevant, no matter where the internet goes next.
Common Questions About IP Address Assignment
Even with a solid plan, questions always pop up when you're in the trenches managing a network. Knowing how to assign an IP address is one thing, but troubleshooting the quirky issues that arise in real-world settings is another. Let's tackle some of the most frequent questions we hear from folks in education, retail, and corporate sectors.
A classic headache is a device that connects to the WiFi but can't access the internet. Nine times out of ten, this happens because it failed to grab an IP address from the DHCP server. This could be anything from a misconfigured DHCP scope to a server that has simply become unresponsive.
For a deeper dive into that specific problem, you can explore common reasons why a DHCP server is not responding and how to fix it.
IP Conflicts and How to Avoid Them
An IP conflict is what happens when two devices on the same network accidentally end up with the same IP address. It's a classic networking problem that effectively knocks both devices offline because the router has no idea where to send data packets. Think of it like two houses on the same street having the identical address—the mail carrier would be completely lost.
So, how can you prevent this mess?
- Use DHCP Reservations: For critical devices like printers or servers, reserve an address in your DHCP server instead of setting a static IP on the device itself. This is a great feature in platforms like Cisco Meraki that gives you the stability of a static IP with the ease of centralized management.
- Audit Your Static IPs: If you absolutely must use static assignments, keep a meticulous record. I can't tell you how many times a simple, up-to-date spreadsheet has saved me hours of troubleshooting.
- Segment Your Network: Using VLANs to separate different user groups (like students, staff, and guests) dramatically reduces the chances of an accidental conflict spilling over and affecting everyone.
In busy BYOD corporate sectors, IP conflicts are more common than you'd think. A well-managed DHCP server and clear IP assignment policies are your best defense. This is especially true when deploying advanced Authentication Solutions like IPSK or EasyPSK, which rely on stable, predictable network addressing.
Static vs DHCP for WiFi Access Points
Should your WiFi access points have static IPs? My answer is an emphatic "yes." Your APs are the backbone of your wireless network. If their IP addresses are constantly changing, devices will drop their connections, and your management platform might lose contact with them entirely.
Assigning a static IP—or, even better, a DHCP reservation—ensures they are always reachable and reliable. This is especially critical if you're running a Captive Portal. The portal's job is to redirect user traffic to a specific login page, and that whole process is much smoother when your core network infrastructure has a fixed, predictable address scheme.
At Splash Access, we specialize in making these complex networking challenges simple. Our solutions integrate seamlessly with Cisco Meraki to provide robust guest WiFi, secure authentication, and intelligent IP management for any environment. Learn more at https://www.splashaccess.com.


